How To
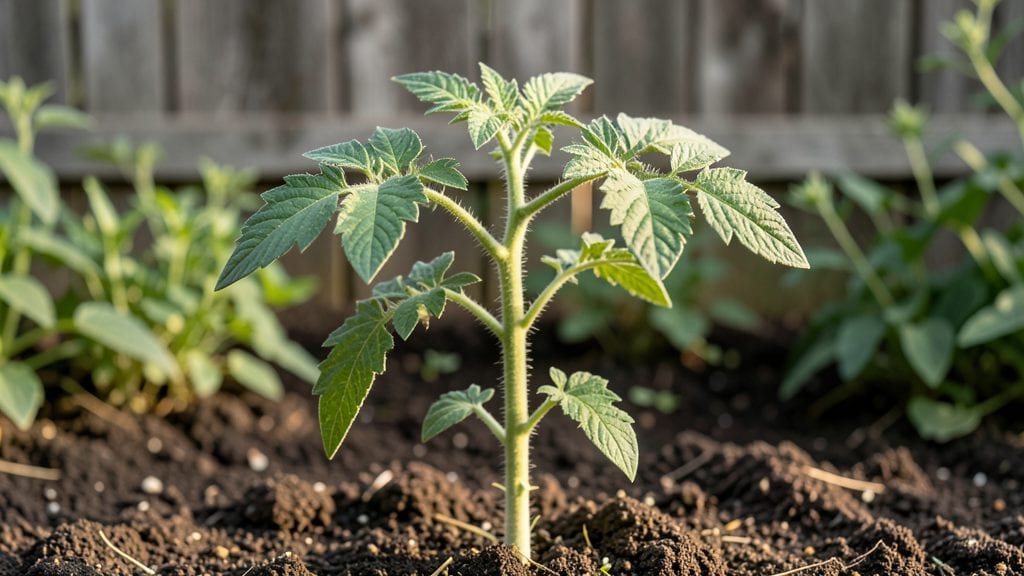
Tomato seed leaves are the tiny powerhouses that decide whether your seedlings will thrive or flop—here’s how to spot them and keep them strong. 🌱 Those first two round leaves aren’t true leaves at all; they’re the plant’s emergency food supply, storing energy until real leaves take over.
I’ve watched dozens of seedlings fail because people mistook them for weak growth, but these cotyledons are actually a sign of success.
Keep them happy with bright light (a sunny windowsill or grow light), just enough water to keep soil damp—not soggy—and no fertilizer yet.
Overwatering or dim light turns those sturdy leaves yellow or mushy, while proper care gives you stocky, dark-green seedlings ready for their next phase in about a week. The moment true leaves appear—narrower, serrated edges—they’re ready to handle a little more attention.
📚 In This Guide
- What you need
- Instructions
- Tips and common mistakes
- Wrapping up and next steps
What you need
- ● Tomato seeds – 10–20 seeds (heirloom or hybrid, your choice!)
- ● Seed-starting mix – 1 small bag (2–3 quarts) of sterile, peat-free potting soil (or coco coir for eco-friendly sprouting)
- ● Small containers – 2–4 biodegradable pots, egg cartons, or even recycled yogurt cups (3–4 inches deep)
- ● Water spray bottle – 8–12 oz (for gentle hydration without over-saturating)
- ● Clear plastic wrap or humidity dome – A ziplock bag or cling film (to create a mini greenhouse)
- ● Sunlight or grow light – A sunny windowsill (south-facing) or a basic LED grow light (12–16 hours/day)
- ● Plant labels – To track seed varieties (toothpicks + masking tape work too!)
- ○ Heat mat (optional) – A small seedling heat mat (70–80°F) speeds up germination
- ● Fertilizer – A balanced, water-soluble fertilizer (5-5-5 or 10-10-10) for later stages
- ● Tweezers – For delicate seed placement (if you’re a perfectionist!)
- ● Fan (gentle breeze) – Prevents damping-off disease by improving airflow
Step-by-Step guide to growing tomato seedlings in 7 days
Here’s how to coax tomato seeds into strong, healthy sprouts without the fuss.
🌱 Step 1: Prep Seeds and Soil for Fast Germination
Soak the tomato seeds in a bowl of warm water for 12 hours—this softens the outer shell and speeds up germination. While they soak, fill your seed-starting trays with the 1 quart of seed-starting mix you’ve got ready. Press it down gently so it’s firm but not compacted. You want tiny roots to have something solid to grip.
Moisten the mix until it’s damp like a wrung-out sponge—no puddles, just even moisture. Cover the trays with plastic wrap or a humidity dome to trap warmth. Tomato seeds germinate best at 75-85°F, so if your home runs cooler, place the trays on a seedling heat mat. This is the moment that matters: consistent warmth and moisture will get you sprouts in 5-7 days.
💧 Step 2: Plant Seeds at the Right Depth
Use your finger to make a tiny hole—about ¼ inch deep—in each cell of the tray. Drop 1-2 seeds per cell (just in case one doesn’t sprout). Cover them lightly with a sprinkle of the same mix, but don’t bury them deeper than ½ inch. Press gently to secure them, then mist the surface with water until it’s evenly damp.
Here’s the thing—tomato seeds need darkness to germinate. Once planted, keep the trays covered with the plastic wrap or dome. Check daily for condensation on the inside; if it’s dry, mist again. You’ll see the first sprouts in 3-5 days, but don’t peek too often—light kills germination. Patience now means stronger seedlings later.
☀️ Step 3: Uncover and Move to Light
As soon as the first green shoots appear—usually 5-7 days—remove the cover immediately. This prevents damping-off, a fungal disease that turns seedlings to mush overnight. Place the trays under a grow light or in the brightest window you have. Tomato seedlings need 14-16 hours of light daily to grow sturdy, not leggy.
If your seedlings stretch toward the light with thin stems, they’re reaching for more intensity. Adjust the grow light so it’s 2-4 inches above the tallest sprout and raise it as they grow. You’ll see compact, dark green leaves in 7-10 days—that’s your signal everything’s on track. No scissors needed; just good light and space.
🌿 Step 4: Thin and Strengthen Seedlings
Once the seedlings have 2-3 true leaves (the first set are cotyledons, the real leaves come after), it’s time to thin. Use clean scissors to snip the weaker seedling at soil level, leaving the stronger one in each cell. This reduces competition for nutrients and gives your winner room to grow.
Water the remaining seedlings at the base—not overhead—to avoid fungal issues. After thinning, fertilize lightly with the ½ teaspoon of balanced fertilizer dissolved in water. You’ll notice new growth within a week, and the stems will thicken noticeably. This is where your seedlings go from fragile to formidable.
Tips & tricks for perfect tomato seedling growth
Here's what I've learned after growing dozens of batches—these tricks make all the difference when you're working with tiny seeds and delicate sprouts.
Soak Smart: That 12-hour soak in warm water is your secret weapon for faster germination. I like to use water that's about 85°F—just warm enough to feel comfortable to the touch, not scalding. If your water cools below 75°F while soaking, pop the bowl in a warm spot like on top of the fridge or near a sunny window. The goal is to keep seeds hydrated and cozy during this critical first step.
Planting Precision: When making those ¼-inch deep holes in Step 2, use your finger to gauge depth—it's easier than measuring with a ruler. Press the seeds gently but firmly into place so they make good contact with the soil. If you're planting 1-2 seeds per cell, I recommend placing them ½ inch apart within the same hole. This way, if one doesn't sprout, you've got a backup without crowding.
Light Management: The 14-16 hours of light daily in Step 3 is non-negotiable for sturdy seedlings. If you don't have a grow light, position your trays on a windowsill facing south for maximum sunlight. I've found that rotating the trays quarter-turn daily prevents them from leaning toward one side. Watch for that 2-4 inch distance from grow light to seedlings—too close burns them, too far stretches them.
Thinning Technique: When you're ready to thin in Step 4, use clean scissors and make a clean cut at soil level. I like to sterilize my scissors with rubbing alcohol between cuts to prevent spreading any potential fungal spores. After thinning, give your seedlings a gentle shake to help them strengthen their stems—this mimics natural wind conditions and creates tougher plants. The ½ teaspoon of fertilizer should be dissolved in 1 cup of water for a light, balanced feeding.
Pro Tips for Tomato Seed Leaves
- Here's what I've learned after growing dozens of batches—these tricks make all the difference when you're working with tiny seeds and delicate sprouts.
- Soak Smart: That 12-hour soak in warm water is your secret weapon for faster germination.
- Planting Precision: When making those ¼-inch deep holes in Step 2, use your finger to gauge depth—it's easier than measuring with a ruler.
Frequently asked questions
Got questions about growing tomato seed leaves? You’re not alone—here are the answers to the most common ones!
Can I use tomato seed leaves in cooking?
While tomato seed leaves aren’t typically eaten like mature leaves, they’re edible and packed with nutrients! Some gardeners use them in teas or as a garnish. However, their primary purpose is to sprout seeds efficiently—so focus on their sprouting superpowers first!
How long do tomato seed leaves last before they dry out?
Tomato seed leaves stay fresh for about 3–5 days when stored in a sealed container with a damp paper towel. If they wilt or turn brown, they’re past their prime. For best results, use them within 24–48 hours of harvesting for optimal sprouting.
What if my tomato seed leaves don’t sprout seeds?
No sprouts? Check these fixes:
- Moisture: Leaves must stay damp but not soggy.
- Warmth: Place near a sunny window or use a heat mat (70–80°F ideal).
- Freshness: Old or dried leaves won’t work—harvest new ones!
- Seed viability: Test seeds separately to rule out old or bad seeds.
Can I substitute tomato seed leaves with other materials?
Yes! If you’re in a pinch, try these alternatives:
- Damp paper towels (fold seeds between two layers).
- Cotton balls or felt pads (keep moist).
- Coconut coir (great for humidity control).
- Even a clean coffee filter in a shallow dish!
Tomato leaves are just a natural, scissor-free hack—no need to stress over substitutions!
Are tomato seed leaves safe for all tomato varieties?
This method works for heirloom, hybrid, and even cherry tomatoes. Whether you’re growing beefsteak or tiny snack tomatoes, the seed leaves technique is universally effective. Just ensure your seeds are fresh for the best germination rates.
Wrapping up and next steps
Growing tomato seed leaves in just 7 days without scissors is easier than you think—and the best part?
You’re not just saving time, you’re unlocking a stress-free way to nurture your plants from day one! 🌱 Whether you’re a gardening newbie or a seasoned green thumb, these simple steps turn tiny seeds into vibrant sprouts with minimal effort. You’ve got this!
Ready to take the next step? Try it with your next batch of tomato seeds—or experiment with other veggies like peppers or herbs. Share your sprouting wins with fellow gardeners, and don’t forget to tag us in your progress pics! 📸✨