Planting
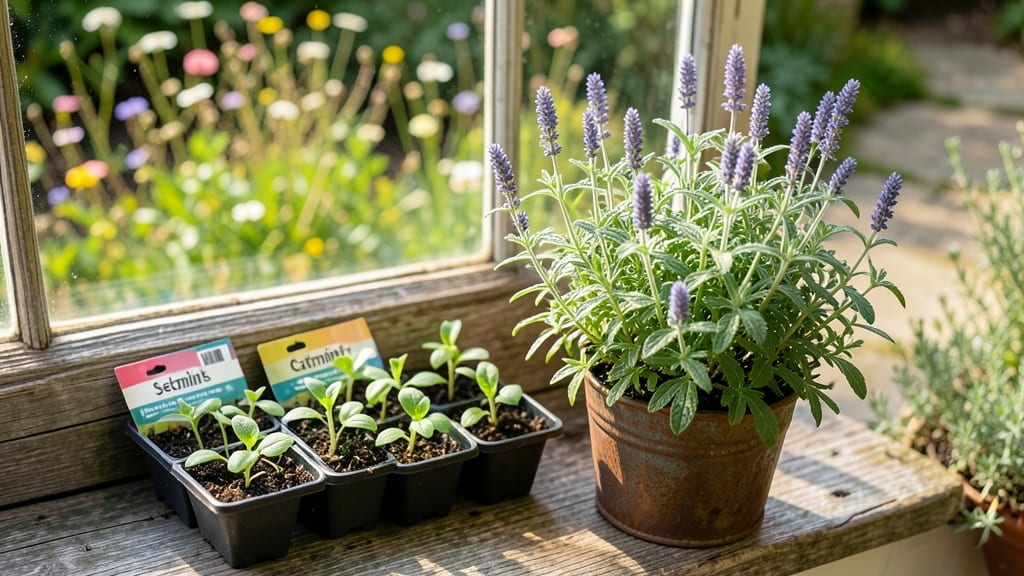
Growing catmint from seeds gives you a fragrant, drought-tolerant pollinator magnet that blooms from early summer until frost. 🌿 I’ve watched bees and butterflies flock to my catmint plants for weeks on end, and the silvery foliage stays lush even when other perennials wilt.
The secret starts with the right soil mix and patience—these seeds need time to germinate and establish.
You’ll need a sunny spot with at least 6 hours of direct light daily, well-draining soil, and a little extra warmth to coax those tiny seeds to sprout.
Most gardeners overlook the need for consistent moisture during germination, which can take 10-21 days—so keep the soil damp (not soggy) and covered with plastic wrap until you see those first green shoots. A seed-starting tray with a heat mat speeds things up.
Once seedlings pop up, thin them to 12-18 inches apart to give each plant room to spread. Catmint thrives on neglect once established—water deeply but infrequently, and let the soil dry between waterings.
By midsummer, you’ll have a cloud of lavender-blue blooms that keep coming back year after year with minimal effort.
Fair warning: These plants spread aggressively, so contain them with deep roots or prune back by one-third after flowering to keep them tidy. The payoff? A garden that hums with pollinators and smells like a meadow every time you brush past it. Ready to get started?
📚 In This Guide
- What you need
- Instructions
- Tips and common mistakes
- Wrapping up and next steps
What you need
- ● Catmint plant seeds: 1 packet (typically 100–500 seeds, depending on the brand). Look for Nepeta varieties like 'Walker’s Low' or 'Six Hills Giant' for best results.
- ● Seed-starting trays or biodegradable pots: 2–4 trays (28–72 cell packs) or 50+ small pots (2–3 inches deep).
- ● Seed-starting mix: 1–2 bags (5–10 quarts) of high-quality, sterile potting mix (avoid garden soil—it’s too dense!).
- ○ Grow lights or sunny windowsill: A full-spectrum LED grow light (optional but helpful) or a south-facing window with 6+ hours of sunlight.
- ● Misting bottle or spray nozzle: For gentle watering without disturbing seeds.
- ● Plastic wrap or humidity dome: To retain moisture while seeds germinate.
- ● Transplanting tools: Small hand trowel or spoon for moving seedlings.
- ● Well-draining garden soil: Catmint hates soggy roots! Amend clay soil with compost or sand if needed.
- ● Sunny spot: Full sun (6–8+ hours daily) for best blooms and fragrance.
- ● Mulch: 1–2 inches of organic mulch (straw or shredded leaves) to retain moisture and deter weeds.
- ○ Stakes or cages (optional): For taller varieties like 'Six Hills Giant' to support sturdy growth.
- ● 🌡️ Ideal germination temp: 60–70°F (15–21°C). Use a heat mat if your space is cooler.
- ○ ✨ Speed up germination: Soak seeds in warm water for 12 hours before planting (optional but helpful).
- ● 🔄 Thin seedlings: Once they sprout, thin to 12–18 inches apart to prevent overcrowding.
Step-by-Step instructions for growing catmint from seeds
Here's how to coax these hardy pollinator magnets from tiny seeds into thriving plants.
🌱 Step 1: Prepare Containers and Seed Starting Mix
Use the 4-inch seed trays and fill them with the 2 gallons of seed-starting mix. I press the mix down gently until it's firm but not packed—this helps prevent air pockets that could smother delicate seedlings. Moisten the mix thoroughly with warm water until it feels like a damp sponge, but not dripping.
Sprinkle the 1 packet of catmint seeds evenly across the surface. I like to tap the packet gently over the tray to distribute them without clumping. Catmint seeds are tiny, so don't worry if they look sparse—they'll germinate just fine. Cover them with a thin layer (1/8 inch) of additional mix—just enough to barely hide them.
💧 Step 2: Create Ideal Germination Conditions
Place the trays in a warm spot, ideally between 65-75°F. A seedling heat mat works wonders here—it keeps the soil consistently warm without fuss. I cover the trays with a clear plastic dome or plastic wrap to trap moisture and warmth. This creates the humid, greenhouse-like environment catmint seeds love.
Check the trays daily but resist watering until you see condensation on the dome. That's your signal the humidity level is perfect. Once condensation appears, remove the dome immediately—catmint seedlings hate soggy conditions. You'll typically see sprouts in 10-20 days, though they can take longer in cooler conditions.
☀️ Step 3: Provide Light and Thin Seedlings
The moment those first true leaves appear (they'll look like tiny, fuzzy catmint versions of the adult plant), move the seedlings to a bright spot with 6-8 hours of indirect light daily. A south-facing window works, but I supplement with a grow light if natural light is weak. Keep the light 3-4 inches above the seedlings—closer than that can scorch their tender leaves.
When seedlings reach 1-2 inches tall and have 2-3 sets of true leaves, it's time to thin. Gently snip the weakest seedlings at soil level with clean scissors, leaving the strongest one in each cell. You'll end up with 4 healthy plants ready for transplanting. This prevents overcrowding and gives each plant room to grow.
🪴 Step 4: Transplant to Larger Containers
Fill the 6-inch pots with the remaining 3 gallons of potting mix, leaving 1 inch of space at the top. I make a small hole in each pot with my finger and gently ease the seedlings out of their trays, keeping the root ball intact. Place each seedling in its own pot, then fill around the roots with more mix, pressing lightly to eliminate air pockets.
Water each pot thoroughly until water runs out the drainage holes. Place them in a spot with full sun (6+ hours daily) and keep the soil consistently moist but not soggy. Catmint thrives in well-draining soil, so I wait until the top inch feels dry before watering again. You'll see new growth within 2-3 weeks, signaling your plants are settling in.
✂️ Step 5: Maintain and Encourage Blooming
Once your catmint plants reach 6 inches tall, start fertilizing with the 10-10-10 fertilizer diluted to half strength every 4-6 weeks during the growing season. This gives them the nutrients they need to produce those iconic lavender-blue flowers. I also pinch back the tips of new growth to encourage bushier plants—just snip off the top 1/3 of the stem with clean pruners.
Deadhead spent blooms regularly to keep your catmint flowering continuously. I simply pinch off the faded flowers between my fingers—no tools needed. This not only keeps the plant looking tidy but also encourages more blooms. With proper care, your catmint will reward you with fragrant, long-lasting flowers that attract pollinators all season long.
Tips & tricks for perfect catmint growth
Growing catmint from seeds rewards patience with stunning pollinator-friendly blooms—here's how to avoid common pitfalls and maximize success.
Seed Starting Mix Tip: In Step 1, when pressing down the 2 gallons of seed-starting mix, aim for firmness similar to a damp sponge. Too loose creates air pockets that smother seeds, while too packed prevents proper moisture absorption. Gently press with your fingers until the surface holds its shape but still feels slightly springy. This balance is critical for those tiny catmint seeds that need consistent contact with moisture.
Germination Temperature Secret: The 65-75°F range in Step 2 is non-negotiable for catmint seeds. If your home runs cooler, place the trays on a seedling heat mat set to 75°F for consistent warmth. I've learned this the hard way—seeds left in cooler conditions (below 65°F) often fail to germinate or produce weak, leggy seedlings that struggle to thrive. A simple heat mat solves this problem perfectly.
Thinning Technique: When thinning in Step 3, use clean scissors to snip seedlings at soil level rather than pulling them out. This prevents disturbing the roots of your remaining plants. I also recommend thinning gradually—remove half the weakest seedlings first, wait 3 days, then thin the rest. This gives your plants time to adjust to their new space without shock.
Transplanting Hack: Before transplanting to 6-inch pots in Step 4, I soak the root balls of my seedlings in warm water for 5 minutes. This helps prevent transplant shock by ensuring the roots are fully hydrated. After transplanting, I water thoroughly until it drains from the bottom, then let the pots sit for 24 hours before placing them in full sun. This gradual acclimation prevents wilting.
Pro Tips for Catmint Plant Seeds
- Growing catmint from seeds rewards patience with stunning pollinator-friendly blooms—here's how to avoid common pitfa...
- Seed Starting Mix Tip: In Step 1, when pressing down the 2 gallons of seed-starting mix, aim for firmness similar to ...
- Germination Temperature Secret: The 65-75°F range in Step 2 is non-negotiable for catmint seeds. If your home runs co...
Frequently asked questions
Got questions about growing catmint plant seeds? You’re not alone! Here are answers to the most common queries to help you cultivate this fragrant, pollinator-loving beauty with ease.
How long does it take for catmint seeds to germinate?
Catmint seeds typically sprout in 14–30 days after planting, depending on soil warmth and moisture. For faster results, pre-soak seeds for 24 hours or use a seedling heat mat. Patience is key—don’t disturb the soil until tiny sprouts appear!
When is the best time to plant catmint seeds?
Sow seeds indoors 8–10 weeks before your last frost for transplants, or directly outdoors after the soil warms to 60°F+ (spring or early summer). Catmint thrives in full sun, so avoid late-season plantings—it needs time to establish roots before winter.
Why aren’t bees visiting my catmint plants?
Bees love catmint, but a few issues might deter them: underwatering, lack of sunlight, or pesticide use. Ensure your plant gets 6+ hours of sun daily and water deeply (but not soggy). Skip chemical sprays—let nature’s pollinators do their work!
Can I grow catmint from cuttings instead of seeds?
Catmint propagates easily from softwood or semi-hardwood cuttings in spring or early summer. Snip 3–4-inch stems, remove lower leaves, dip in rooting hormone (optional), and plant in moist potting mix. Roots form in 2–4 weeks—faster than seeds!
Why is my catmint turning yellow or wilting?
Yellowing leaves often signal overwatering or fungal issues (like powdery mildew). Wilting? Check for underwatering or root rot. Catmint prefers well-draining soil—amend heavy clay with compost. Prune affected stems and adjust watering to 1 inch per week.
How do I keep catmint blooming all season?
Deadhead spent flowers regularly to encourage new blooms, but leave some seed heads for pollinators. After the first flush of flowers, give your plant a light trim to promote bushier growth. Fertilize lightly with balanced 10-10-10 in spring—too much nitrogen = fewer flowers!
Wrapping up and next steps
Growing catmint plant seeds is a rewarding way to attract pollinators, add fragrance to your garden, and enjoy long-lasting blooms with minimal effort! 🌿 Whether you’re a beginner or a seasoned gardener, these hardy plants thrive with just a little care—sunlight, well-draining soil, and occasional pruning are all you need.
The best part? Your garden will soon buzz with bees, butterflies, and hummingbirds while filling the air with a delightful minty scent.
Ready to transform your outdoor space? Start by ordering your seeds today and give your garden the vibrant, pollinator-friendly boost it deserves. Happy planting! 🌸