Lawn
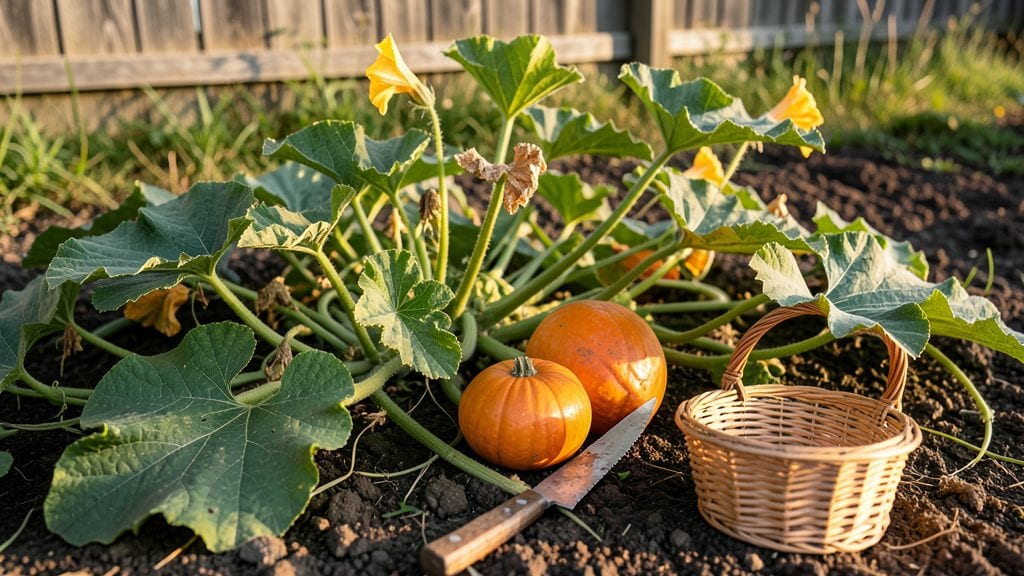
Growing pumpkin seed mixes from scratch means you’ll have vines heavy with fruit by midsummer—not the sad grocery-store pumpkins. 🌱 I learned the hard way that cold-stratifying seeds for six weeks jumpstarts germination, so you skip the waiting game and get straight to lush, sprawling vines.
The right seed mix makes all the difference between ornamental gourds and the kind you carve or bake with.
Start with a 50/50 mix of potting soil and compost in a raised bed or large container—pumpkins need room to stretch. Plant seeds 1 inch deep, spacing them 2 feet apart in rows 6 feet wide for easy maintenance.
If your space is tight, opt for smaller varieties like ‘Jack Be Little’ or ‘Sugar Pie,’ which stay compact but still produce. The key? Morning sun and afternoon shade in hot climates keeps leaves from scorching.
By late summer, you’ll be harvesting pumpkins that weigh 10+ pounds with minimal effort—just consistent watering and a balanced fertilizer every 4-6 weeks. The vines themselves become a living trellis, and the flowers attract bees like nothing else.
Save a few seeds from your best pumpkins for next year’s mix, and you’ll have a self-sustaining harvest cycle.
Even if you’ve never grown pumpkins before, this method works—no green thumb required. Just watch for squash vine borers (wrap stems in aluminum foil) and powdery mildew (spray with neem oil).
The payoff? Fresh pumpkin bread, carving material, and bragging rights when neighbors ask where you got yours. Let’s get those seeds started!
📚 In This Guide
- What you need
- Instructions
- Tips and common mistakes
- Wrapping up and next steps
What you need
- ● Pumpkin seeds: 100–200 fresh, organic seeds (save them from store-bought pumpkins or buy heirloom varieties for best results).
- ● Cold-stratification setup: 1–2 paper towels or damp peat moss
- ● 1 resealable plastic bag (quart-sized or larger)
- ○ Optional: A small container (like a yogurt cup) for layering seeds
- ● Planting containers: Biodegradable pots (3–4 inches deep) or
- ● Seed-starting trays with drainage holes
- ● Growing medium: 2–3 cups of sterile potting mix (lightweight, seed-starting blend preferred).
- ● Watering can or spray bottle (gentle misting avoids seed displacement).
- ● Grow lights or sunny windowsill (6+ hours of light daily after germination).
- ● Seedling heat mat (speeds up germination in cool climates).
- ● Humidity dome or plastic wrap (keeps moisture high during early stages).
- ● Fertilizer: Diluted fish emulsion or compost tea (once seedlings sprout).
- ● Label markers (to track varieties if mixing seeds).
- ● Garden twine or stakes (for trellising if growing vining pumpkins).
Step-by-Step instructions for growing pumpkin seed mix from seed
Here's how to transform those winter pumpkin seeds into vibrant spring blooms using cold stratification.
🌱 Step 1: Select and Prepare the Seeds
Choose organic, non-GMO pumpkin seeds—the ones from your Halloween pumpkin work perfectly. Remove any remaining pumpkin flesh by rinsing them under cool water and letting them dry completely on a paper towel for 24 hours. This prevents mold during stratification.
I like to soak the seeds in lukewarm water for 12 hours first. This softens the hard outer shell and kickstarts germination. After soaking, drain them well and pat dry with another towel. You'll need about 20-25 seeds for a full display—more if you're planting multiple locations.
💧 Step 2: Cold Stratify for 6 Weeks
Place the dried seeds in a paper towel or coir mat (not plastic—they need airflow). Fold the towel to create a loose bundle and put it in a resealable plastic bag. Add just enough water to moisten the towel thoroughly but not drip. Seal the bag and place it in your refrigerator's crisper drawer.
Keep the seeds at 35-40°F for exactly 6 weeks. Check them weekly—they should stay damp but not soggy. If condensation forms inside the bag, open it for 10 minutes to air out. This cold treatment mimics winter and tricks the seeds into thinking spring has arrived.
☀️ Step 3: Plant in Well-Draining Soil
Fill 4-inch pots with a mix of 50% potting soil and 50% perlite—this ensures excellent drainage, which pumpkin seeds hate. Plant 3-4 seeds per pot, spacing them 1 inch apart and pressing them ½ inch deep into the soil. Gently firm the soil around them so they stay in place.
Water lightly with a spray bottle until the soil is evenly moist but not saturated. Place the pots in a warm, sunny spot (like a south-facing windowsill) where temperatures stay above 60°F. You'll see tiny sprouts in 7-14 days—watch for the first true leaves to emerge, which look like miniature pumpkin leaves.
🌿 Step 4: Transplant and Maintain Growth
Once seedlings have 2-3 sets of true leaves (about 4-6 weeks after planting), transplant them to the garden or larger 8-inch pots. Choose a location with full sun (6+ hours daily) and well-draining soil. Space plants 18-24 inches apart to give their vines room to sprawl.
Water deeply once weekly—pumpkin seeds are drought-tolerant but won't flower without consistent moisture. Mulch with 2 inches of straw to retain soil moisture and suppress weeds. You'll notice the first buds forming in 8-10 weeks after transplanting, signaling that your stratification paid off.
✂️ Step 5: Deadhead and Encourage More Blooms
As flowers fade, pinch off spent blooms with your fingers to redirect the plant's energy into producing more flowers. I do this every 2-3 days during peak bloom season. Pumpkin seeds thrive in warm weather (70-85°F), so if your summer cools below 65°F, move pots to a sheltered spot or extend the season with a frost cloth.
Fertilize lightly every 4 weeks with a balanced 10-10-10 fertilizer to support continuous blooming. With proper care, your pumpkin seed mix will reward you with bright orange and yellow flowers from late spring through early fall—just like the ones you admired in the garden center.
Tips & tricks for perfect pumpkin seed mix blooms
Between us, these little seeds pack a big punch when you follow the right steps. Here's what I've learned after growing pumpkin seed mixes for years—details that make all the difference between a few sad sprouts and a vibrant display of orange and yellow blooms.
The Soaking Secret: That 12-hour lukewarm water soak in Step 1 isn't just about softening the shells—it's also a germination kickstart. I've found that adding one teaspoon of honey to the soaking water (optional but effective) provides natural antibacterial properties that prevent mold during the critical 24-hour drying period. The honey also gives the seeds a gentle energy boost right from the start.
Stratification Success: The exact 6-week cold treatment at 35-40°F is non-negotiable for breaking pumpkin seeds' natural dormancy. Here's my pro move: I label the bag with the start date and set a reminder to check weekly. If you forget, the seeds can develop mold—trust me, I've learned this the hard way. The key is that consistent 35-40°F range; if your fridge runs cooler, move the bag to the coldest part of the crisper.
Planting Precision: In Step 3, that ½-inch depth matters more than you might think. Planting too shallow can expose seeds to temperature fluctuations, while planting too deep delays germination. I use a pencil to make small holes exactly ½-inch deep—this ensures consistent planting depth across all your pots. Also, that 50/50 soil-perlite mix is crucial; I've seen pumpkin seeds rot in heavy soil because they hate soggy roots.
Transplant Timing: Waiting for those 2-3 sets of true leaves before transplanting (Step 4) gives seedlings enough strength to handle the shock. I've found that transplanting too early leads to leggy, weak plants that struggle to establish. Once you see that third set of true leaves, your seedlings are ready for their new home—just handle them gently by the leaves, never the stems.
Pro Tips for Pumpkin Seed Mix
- Between us, these little seeds pack a big punch when you follow the right steps. Here's what I've learned after growi...
- The Soaking Secret: That 12-hour lukewarm water soak in Step 1 isn't just about softening the shells—it's also a germ...
- Stratification Success: The exact 6-week cold treatment at 35-40°F is non-negotiable for breaking pumpkin seeds' natu...
Frequently asked questions
What’s the best time to plant pumpkin seed mix for cold stratification?
Plant your pumpkin seed mix 8–10 weeks before your last frost date (typically late fall or early winter). Cold stratification (chilling seeds for 6 weeks) mimics natural winter conditions, ensuring faster, more reliable germination in spring. For Zone 5–7, aim for October–November planting.
How do I know if my seeds are properly stratified?
Your seeds are ready when they’ve been consistently chilled at 35–45°F (2–7°C) for 6 weeks. Check for slight softening or a tiny crack in the seed coat—this signals moisture absorption and readiness to sprout. If stored in a damp paper towel, they should look plump, not moldy.
Can I use store-bought pumpkin seeds instead of fresh ones?
Yes! Raw, unsalted pumpkin seeds (from the grocery store or roasted) work well, but avoid pre-salted or flavored varieties—the salt can inhibit germination. Rinse and dry seeds thoroughly before stratification. For best results, use heirloom or organic seeds if available.
What should I do if my seeds sprout mold or rot during stratification?
Mold or rot usually means too much moisture or poor airflow. If you spot fuzzy growth, discard the batch immediately—mold spreads fast. To prevent it, use a well-ventilated container (like a breathable mesh bag) and check seeds weekly. If seeds smell sour, they’re past saving.
How long does it take for pumpkin seed mix to bloom after planting?
With proper cold stratification, expect vines to emerge in 7–14 days and first blooms in 50–60 days (depending on variety). Pumpkin flowers are short-lived (1 day for females, 2–3 for males), so watch for pollination cues like bees buzzing around bright orange blossoms!
Can I save seeds from store-bought pumpkins for next year?
Scoop seeds from fully ripe, organic pumpkins, rinse, dry, and store in a cool, dark place. They’ll keep for 1–2 years. For best germination, re-stratify saved seeds the next fall—just like fresh ones. Pro tip: Label varieties to avoid surprises!
Wrapping up and next steps
Growing your own pumpkin seed mix is a rewarding journey that brings vibrant blooms to your garden in just six weeks! With the right materials and a little patience, you’ll enjoy stunning flowers and even delicious harvests.
Whether you’re a seasoned gardener or a beginner, this method proves that big results come from small seeds—literally!
Ready to dive in? Start by gathering your supplies, follow the cold-stratification steps, and watch your garden transform. Your future pumpkin patch awaits—happy planting! 🌱💐