Size
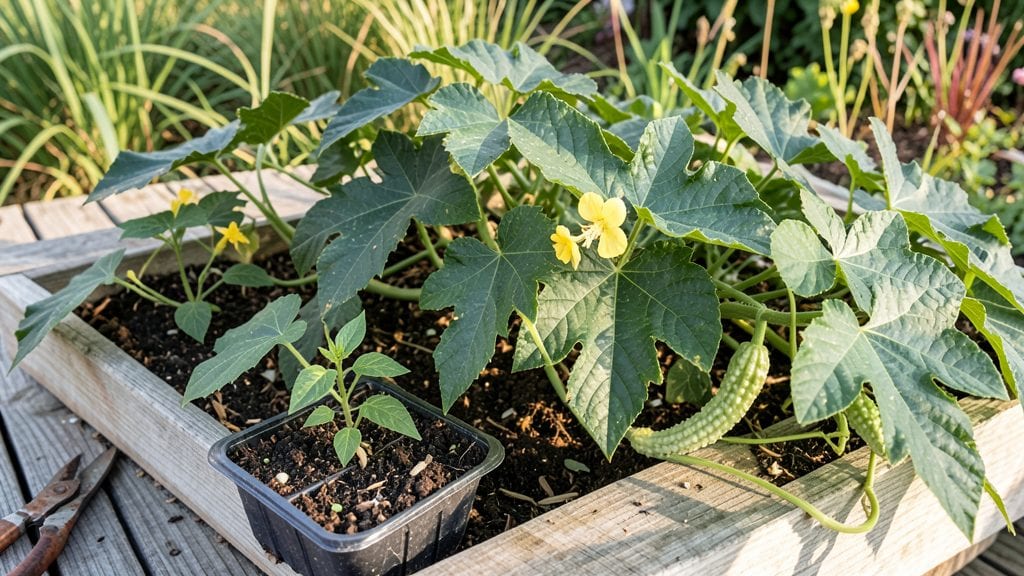
Growing ampalaya from seeds can feel like waiting for a slow-moving vine to finally take off—but I’ve cracked the code for fast germination that gets those first leaves popping in under two weeks. 🌱 The trick isn’t just patience; it’s mimicking the tropical conditions these seeds crave before they even hit the soil.
Between you and me, my first batch took three weeks to sprout, but after tweaking a few simple steps, I now see seedlings in less than half that time.
You’ll need just three things to start: fresh seeds (or dried ones soaked overnight), a warm spot near a sunny window, and a small pot with well-draining soil. Ampalaya loves heat—think 75 to 85 degrees—and won’t tolerate cold drafts.
I use a seedling heat mat for the first week, and it makes all the difference. Once those first sprouts appear, they’ll grow fast, climbing or sprawling depending on how you train them.
The key is keeping the soil consistently moist but not soggy—too much water drowns the roots before they get a chance to establish.
By the time you’re pinching back the vines to encourage bushier growth, you’ll be staring at a plant that’s already three feet tall and ready to produce fruit. The leaves stay glossy and vibrant, and the flowers—those delicate yellow blooms—signal it’s time to watch for the distinctive, spiky green fruits.
Harvest starts as early as three months from seed, but with the right conditions, you can push that even sooner.
Works for both indoor growers and outdoor gardeners in warm climates, though container growers should plan for trellises to keep those vines from taking over. Here’s how to make it happen without the usual waiting game.
📚 In This Guide
- What you need
- Instructions
- Tips and common mistakes
- Wrapping up and next steps
What you need
- ● Ampalaya seeds: 5–10 fresh, organic seeds (harvested from a ripe, healthy bitter melon or purchased from a trusted supplier). Pro tip: Soak seeds in warm water for 4–6 hours before planting to speed up germination! 💡
- ● Growing containers or garden bed: Containers: 12-inch (or larger) pots with drainage holes (3–5 pots per seed, if starting indoors). Use lightweight, breathable materials like coconut coir or plastic.
- ● Garden bed: A sunny spot (6+ hours of sunlight daily) with well-draining soil. Ampalaya loves space—ensure at least 3 feet of width between plants.
- ● High-quality potting mix: 5–10 gallons of well-draining, organic soil mix (e.g., 60% coco coir, 30% perlite, 10% compost). Ampalaya hates soggy roots! 🚫💦
- ● Watering can or spray bottle: With a fine nozzle for gentle watering (avoid over-saturating seeds).
- ○ Grow lights (optional but helpful): If starting indoors, a full-spectrum LED grow light (12–16 hours/day) to mimic sunlight until transplanting.
- ● Fertilizer: A balanced, organic fertilizer (e.g., 10-10-10 NPK) or compost tea for young seedlings.
- ● Twine or small stakes: For supporting vines as they grow (ampalaya can climb up to 10+ feet!).
- ● Pruning shears: Sharp, sterilized shears for trimming vines or harvesting.
- ● Seedling heat mat: Keeps soil warm (75–85°F) for faster germination if your climate is cool. 🌡️
- ● Mulch: Straw or shredded leaves to retain moisture and suppress weeds.
- ● Trellis or netting: For vertical gardening (saves space and encourages bushier growth!).
- ● pH test kit: Ampalaya prefers slightly acidic to neutral soil (pH 6.0–7.0).
- ● Insecticide (natural): Neem oil or insecticidal soap to deter pests like aphids or whiteflies.
Step-by-Step instructions for growing ampalaya seeds
Here’s how to get your ampalaya seeds sprouting in under a week—no waiting months!
🌱 Step 1: Soak Seeds Overnight for Faster Germination
Fill a small bowl with lukewarm water and add the ampalaya seeds. Let them soak for 8-12 hours—this softens the tough outer shell and speeds up germination. I like to use a mesh bag or cheesecloth to keep them contained while soaking.
After soaking, drain the water and let the seeds sit in a damp paper towel for another 4-6 hours. This keeps them hydrated without drowning them. You’ll see the seeds plump up slightly—that’s your signal they’re ready to plant.
🪴 Step 2: Prepare Containers and Planting Medium
Use small pots or seed trays with drainage holes to prevent waterlogging. Fill them with a lightweight seed-starting mix (not garden soil—it’s too dense). Moisten the mix until it’s damp but not soggy, like a wrung-out sponge.
Plant the soaked seeds ½ inch deep, spacing them 2 inches apart in each pot. Ampalaya seeds are large, so one per pot works best. Gently press the soil around them to ensure good contact—this helps roots anchor faster.
💧 Step 3: Create a Warm, Humid Environment
Ampalaya thrives in warmth, so place the pots in a spot with 75-85°F soil temperature. A seedling heat mat or warm windowsill works well. Cover the pots with clear plastic wrap or a humidity dome to trap moisture—this mimics tropical conditions and encourages quick sprouting.
Check the soil daily and mist lightly if it feels dry. You’ll see tiny sprouts in 3-7 days, depending on warmth. Once they emerge, remove the cover immediately to prevent mold—ampalaya seedlings are sensitive to excess moisture.
☀️ Step 4: Provide Bright, Indirect Light
Move the seedlings to a bright spot with 4-6 hours of indirect sunlight once they’ve sprouted. Direct sun can scorch tender leaves at this stage. A south-facing window with sheer curtains works well, or use a grow light 4-6 inches above the plants.
Rotate the pots a quarter turn daily so seedlings grow straight instead of leaning. You’ll notice leaves turning toward the light—that’s your cue to adjust placement. Strong seedlings will have dark green, glossy leaves within 2-3 weeks.
✂️ Step 5: Thin and Transplant When Ready
If you planted multiple seeds per pot, thin to the strongest seedling once they’re 2 inches tall. Use scissors to snip weak stems at soil level—this prevents competition for nutrients. Ampalaya vines grow fast, so transplant to larger pots or the garden when they reach 4-6 inches.
Hardening off takes 7-10 days: start by placing seedlings outside for 1 hour daily, gradually increasing time. Watch for wilting—if leaves droop, they’re not ready yet. Once they tolerate full sun without stress, they’re ready for the garden or container setup.
Tips & tricks for perfect ampalaya seed germination
Fast germination is all about creating the right conditions—here's how to skip the waiting game and get those ampalaya seeds sprouting in record time.
The Soak Factor: Trust me on this—don't rush the 8-12 hour soak in Step 1. The seeds need this full time to soften their tough outer shells. I've tried cutting it short, and while they might germinate, they take twice as long. Pro tip: Use lukewarm water (around 85°F) for best results—too hot and you'll shock the seeds, too cold and they won't absorb moisture efficiently.
Seedling Rescue Strategy: If you notice mold forming after Step 3 when you remove the cover, don't panic. Ampalaya seedlings are sensitive to excess moisture, so act fast! Immediately increase airflow by moving to a well-ventilated spot and reduce watering frequency. I've saved many batches by catching this early—just keep the soil lightly moist, not soggy.
Lighting Hack: For Step 4, if you don't have a south-facing window, a simple LED grow light works wonders. Position it 4-6 inches above the seedlings and keep it on for 12 hours daily. I use a basic 10-watt bulb on a timer—it's affordable and gets the job done. The key is consistent light exposure without direct sun that can scorch those tender leaves.
Thinning Timing: When thinning in Step 5, wait until seedlings reach exactly 2 inches tall. This gives them enough root development to handle the transplant shock. I've made the mistake of thinning too early, and those weak seedlings often fail to recover. Use clean scissors to snip at soil level—this prevents disease from spreading through torn stems.
Pro Tips for Grow Ampalaya Seeds
- Fast germination is all about creating the right conditions—here's how to skip the waiting game and get those ampalay...
- The Soak Factor: Trust me on this—don't rush the 8-12 hour soak in Step 1. The seeds need this full time to soften th...
- Seedling Rescue Strategy: If you notice mold forming after Step 3 when you remove the cover, don't panic. Ampalaya se...
Frequently asked questions
Got questions about growing ampalaya (bitter melon) from seeds? You’re not alone!
Here are some of the most common concerns—and practical answers—to help you grow a thriving bitter melon harvest.
How long does it take for ampalaya seeds to germinate?
Ampalaya seeds typically sprout within 7–14 days if kept in warm (70–90°F), moist conditions. For faster germination, soak seeds in warm water for 24 hours before planting. If germination takes longer than 3 weeks, check soil moisture and warmth—seeds need consistent heat to break dormancy.
Can I grow ampalaya from store-bought bitter melon?
Yes! Save seeds from organic, pesticide-free bitter melons for planting. Rinse and dry the seeds thoroughly, then store them in a cool, dark place until ready to sow. Avoid seeds from hybrid varieties (often labeled "F1"), as they may not produce true-to-type fruit.
Why are my ampalaya seedlings wilting or turning yellow?
Wilting or yellowing leaves usually signal overwatering or poor drainage. Ampalaya prefers well-draining soil—water only when the top inch is dry. If pests like aphids are present, spray with neem oil. Ensure seedlings get 6+ hours of sunlight daily; weak light causes leggy, pale growth.
Do ampalaya plants need support to grow?
Ampalaya vines are vigorous climbers! Use trellises, stakes, or cages to guide growth and prevent sprawling. Without support, vines can become tangled and produce fewer fruits. Train young vines early to encourage upward growth. Bonus: Supported plants yield straighter, easier-to-harvest melons!
What’s the best time to harvest ampalaya?
Harvest when fruits are 3–6 inches long and still firm for tender, less bitter taste. Use pruning shears to avoid damaging vines. For seed-saving, let melons fully mature (turn orange/yellow) and soften before picking. Check plants every 2–3 days—ampalaya grows fast!
Still stumped? Drop your question in the comments—we’re happy to help troubleshoot your bitter melon garden!
Wrapping up and next steps
Growing ampalaya from seeds is a rewarding journey that brings fresh, homegrown produce to your table! With the right soil, warmth, and patience, you’ll soon enjoy lush vines and crisp, nutritious fruits. Remember, consistency is key—whether it’s watering, pruning, or protecting your plants from pests.
Now that you’re armed with these fast germination tricks, why not take the next step? Share your progress with fellow gardeners, experiment with different varieties, or even start a small harvest to enjoy in your favorite dishes. Happy growing—your garden (and taste buds!) will thank you! 🌱✨