Plants
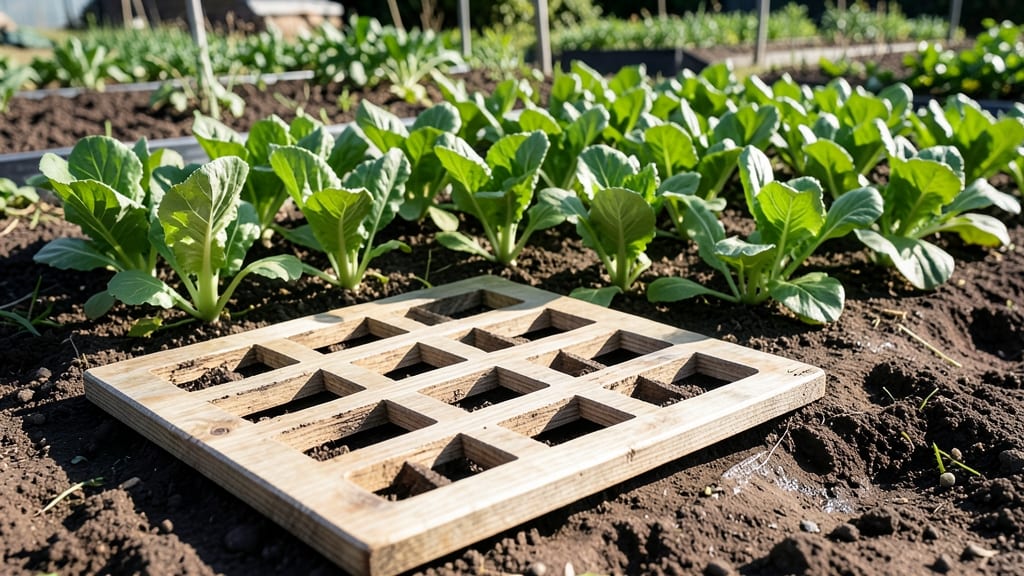
My seeding square template transformed my garden from a chaotic mess to a perfectly spaced, thriving plot—no more guessing or overcrowded seedlings. 🌱 The secret lies in these simple grids that tell you exactly where to drop each seed, ensuring even growth and maximum space efficiency.
You’ll need just a few supplies: graph paper or a free printable template, a pencil, and your seed packets. The template works for any garden size, from tiny containers to sprawling raised beds, and adapts to everything from carrots to sunflowers.
It’s the gardener’s cheat code for consistent, foolproof spacing every time.
With this method, you’ll see seedlings emerge in neat rows, with enough room to grow bushy and strong. No more thinning or crowded plants competing for light—just uniform, healthy growth that makes harvesting a breeze. Plus, it turns garden planning into a visual, stress-free process.
Customize it for your space, whether you’re sowing in a 4-foot plot or a 100-square-foot garden. The template even helps with succession planting, so you’ll always know where to add new seeds as the season progresses. Ready to make spacing effortless?
📚 In This Guide
- What you need
- Instructions
- Tips and common mistakes
- Wrapping up and next steps
What you need
- ● 1–2 sheets of sturdy paper or cardstock (8.5" x 11" or A4 size, depending on your garden plot)
- ● Ruler or measuring tape (preferably with metric/imperial markings for accuracy)
- ● Pencil or fine-tip marker (for drawing clean lines)
- ● Eraser (to correct mistakes)
- ● Scissors or craft knife (for cutting out squares)
- ● Clear tape or glue stick (to secure layers if using multiple sheets)
- ○ Stapler or binder clips (optional, to reinforce durability)
- ○ Grid paper or graphing template (optional, for pre-made guides)
- ● Compass or protractor (if designing circular or angled patterns)
- ● Waterproof ink pen (for outdoor use if laminating)
- ● Laminator or clear plastic sleeves (to protect templates from moisture)
- ● String or twine (to stake templates in the ground)
- ● Staple gun or heavy-duty tape (for securing stakes)
- ● Knowledge of your plants’ spacing requirements (check seed packets or gardening guides).
- ● A level surface (like a table or clean ground) for drawing.
- ● Access to a printer (if using digital templates) or basic drawing skills.
- ● Patience for measuring and cutting—precision pays off in bushier plants! 🌟
How to use a seeding square template for perfect plant spacing
Transform your garden beds into organized, high-yield spaces with this foolproof layout method.
🌱 Step 1: Understand the Template Grid System
A seeding square template divides your planting area into a grid where each square represents the mature size of your plant. For example, if your basil will grow 12 inches wide, each square should be 12x12 inches. Measure your bed and mark the grid with string or a garden hose—this ensures even spacing before you plant a single seed.
I like to sketch the grid on paper first to visualize plant groupings. For instance, a 18-inch square can fit three 6-inch plants along each edge. This prevents overcrowding and lets each plant access sunlight and nutrients without competition.
📏 Step 2: Calculate Square Sizes for Your Plants
Check your seed packet or plant tag for mature size—this determines your square dimensions. For instance, carrots need 3-inch squares, while tomatoes require 18-inch squares. If your bed isn’t a perfect multiple of these sizes, adjust by adding border rows or combining smaller squares into larger ones.
Pro tip: Use a 12-inch ruler or measuring tape to mark the first square, then snap a string across to create straight lines. For curved beds, measure from the center outward to maintain symmetry. This precision eliminates the guesswork of eyeballing spacing.
🌿 Step 3: Plant Seeds Within the Squares
Once your grid is marked, sow seeds directly in the center of each square—this mimics the natural spacing of mature plants. For example, plant one carrot seed per 3-inch square, or three basil seeds per 12-inch square (they’ll thin later). Avoid planting near the edges; the center gives roots room to expand without hitting grid lines.
If your template includes companion plant pairings (like basil and tomatoes), note which squares share borders. This maximizes pollination and pest control while keeping the layout tidy. Water gently after planting to settle seeds into the soil without disturbing their positions.
✂️ Step 4: Thin and Maintain the Layout
When seedlings emerge, thin to the strongest plant per square—this prevents overcrowding and ensures bushy growth. For example, if you sowed three basil seeds in a 12-inch square, keep only the most vigorous seedling. Use clean scissors to snip extras at soil level to avoid disturbing roots.
As plants mature, monitor their spread. If they encroach on neighboring squares, gently prune edges to maintain the grid. This keeps airflow circulating and reduces disease risk. For tall plants like tomatoes, stake them within their squares to support vertical growth without sprawling into adjacent spaces.
🔄 Step 5: Rotate and Adapt the Template
After harvest, sketch your bed’s layout and note which plants thrived or struggled. Next season, adjust square sizes or pairings based on performance. For instance, if your peppers needed more space, expand their squares to 15 inches. This iterative process refines your template over time for peak efficiency.
For perennial plants, mark their squares with landscape fabric or pebbles to avoid replanting in the same spot—this preserves soil health and prevents disease buildup. Over time, your template becomes a living map of what works in your unique microclimate.
Tips & tricks for perfect seeding square layouts
A few precision-focused tricks that'll transform your garden from chaotic to perfectly organized.
Visualize First: Before marking your bed, sketch your template on graph paper using the square sizes from Step 2. This lets you experiment with plant pairings and adjust spacing without wasting time or soil. I always test-fit my layout digitally first—it saves me from having to redo my grid later when I realize my tomatoes need more elbow room than I gave them.
Precision Tools Pay Off: Invest in a 12-inch ruler with a built-in level and a retractable measuring tape for marking straight lines. For larger beds, use a laser level to project perfectly straight lines onto the soil. This ensures your squares are perfectly square and eliminates the wonky angles that make layouts look amateurish. Between us, nothing ruins a good garden plan faster than crooked lines.
Companion Plant Pairings: When arranging your squares in Step 3, group plants that benefit from each other. For example, pair basil (12-inch squares) with tomatoes (18-inch squares)—the basil's scent repels pests that attack tomatoes. I like to color-code my sketch with different markers for each plant family to visualize these relationships before planting. This isn't just about aesthetics; it's about creating a self-regulating ecosystem in your garden.
Long-Term Documentation: After your first harvest, take clear photos of your layout with a ruler for scale in each corner. Store these photos with notes about which plants thrived or struggled. Next season, you'll have a visual reference to adjust your template. I keep a garden journal with these photos and notes—it's become my most valuable gardening tool after years of trial and error.
Pro Tips for Seeding Square Template
- A few precision-focused tricks that'll transform your garden from chaotic to perfectly organized.
- Visualize First: Before marking your bed, sketch your template on graph paper using the square sizes from Step 2. Thi...
- Precision Tools Pay Off: Invest in a 12-inch ruler with a built-in level and a retractable measuring tape for marking...
Frequently asked questions
Got questions about using a seeding square template? You’re not alone! Here are answers to the most common concerns to help you get started with confidence.
What’s the best material for a seeding square template?
A seeding square template can be made from sturdy materials like cardboard, plastic, or even recycled egg cartons. For reusable options, consider acrylic sheets or PVC pipes—they’re durable and easy to clean. Avoid flimsy paper if you’re planting densely or in windy conditions!
How long does it take to see results after using a seeding square template?
Results vary by plant type, but most seedlings should emerge within 7–14 days. Thinning (removing weaker sprouts) typically happens at 2–4 weeks, depending on the plant. Patience is key—consistent moisture and sunlight speed up the process!
Can I reuse a seeding square template, or should I discard it?
Yes! Templates made from plastic, metal, or thick cardboard can be reused for multiple seasons. Clean them with soapy water and disinfectant to prevent disease. Avoid organic materials (like paper) if you plan to reuse—they decompose or harbor pests.
What if my seedlings grow unevenly or too close together?
Uneven growth often happens if seeds weren’t spaced correctly or soil isn’t consistent. Thin seedlings early (use scissors or your fingers) to give strong plants room. For stubborn clusters, gently tease roots apart or transplant the healthiest sprouts. Pro tip: Use a seedling pick for precision!
Are there alternatives to a DIY seeding square template?
Try commercial seedling trays (like 72-cell flats) or modular fabric pots for easy transplanting. For large-scale planting, laser-guided seeders or precision drills offer high-tech solutions. Even a ruler and pencil work in a pinch!
Wrapping up and next steps
Mastering the seeding square template is your ticket to lush, uniform plant growth—whether you're a gardening newbie or a seasoned green thumb! 🌱 By following the right layout, spacing, and timing, you’ll maximize yield and minimize wasted effort.
Now that you’re armed with the perfect template, it’s time to get your hands dirty and watch your garden thrive!
Ready to take the next step? Grab your supplies, sketch your first grid, and start sowing with confidence. Happy planting! 🌿