Lawn
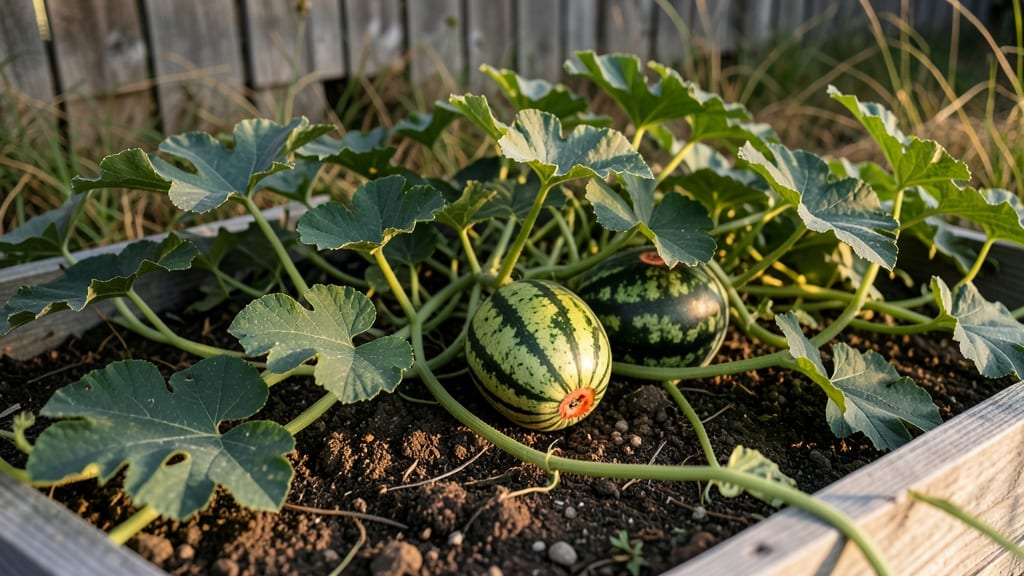
Growing seedless watermelons without the hassle of seeds is easier than you think—just pick the right variety and give them the perfect growing conditions. 🌿 I’ve grown these sweet, crunchy melons for years, and the secret lies in choosing triploid varieties that naturally produce seedless fruit when pollinated correctly.
These aren’t just convenient; they’re juicier and more predictable than their seeded cousins.
The trick starts with soil—rich, well-draining loam warmed to at least 70°F—and a 10-foot row for vines to sprawl. Plant near a seeded watermelon variety (like ‘Sugar Baby’) to ensure pollination, or use a small bee-friendly garden to attract pollinators naturally.
Seedless watermelons need consistent water but hate soggy roots, so mulch heavily to keep moisture steady.
By mid-summer, you’ll spot those classic striped tendrils, and within 80–90 days, you’ll harvest 10–15-pound melons with deep red flesh and no surprises inside. The first bite? Worth every drop of sweat. Just avoid overwatering in the final weeks—it dulls the sweetness.
Works in zones 4–10, whether in raised beds or open ground. Here’s how to keep them thriving—and troubleshoot the few pitfalls that pop up.
📚 In This Guide
- What you need
- Instructions
- Tips and common mistakes
- Wrapping up and next steps
What you need
- ● Seedless watermelon seeds: Choose from varieties like Sugar Baby, Crimson Sweet, or Black Diamond (1–2 packets, ~20–50 seeds per packet).
- ● Potting soil or garden soil: Well-draining, fertile soil with a pH of 6.0–6.8 (1–2 cubic yards for in-ground planting or 10–15 gallons for containers).
- ● Compost or organic fertilizer: A balanced 10-10-10 or compost tea (1–2 cups per plant).
- ● Watering can or hose with a gentle spray nozzle: Watermelons need consistent moisture (1–2 inches per week).
- ● Mulch (straw or black plastic): Helps retain moisture and suppress weeds (1–2 inches thick).
- ● Garden trowel or shovel: For planting seeds or transplanting seedlings.
- ● Garden gloves: Protects hands while handling soil and plants.
- ○ Trellis or stakes (optional): Supports vining varieties (4–6 feet tall).
- ● Pruning shears: For trimming excess vines (if needed).
- ○ Row cover or frost cloth (optional): Protects young plants from cold snaps.
- ● Warm climate or extended growing season: Watermelons thrive in temperatures between 70–90°F (21–32°C). Start seeds indoors 2–3 weeks before the last frost.
- ● Sunny location: At least 6–8 hours of direct sunlight daily.
- ● Space: 3–4 feet between plants or vines (6–8 feet for sprawling varieties).
Step-by-step guide to growing seedless watermelons
Here's how to cultivate sweet, seedless watermelons with minimal fuss—just follow these clear steps.
🌱 Step 1: Select the Right Seedless Variety and Planting Site
Choose a seedless triploid watermelon variety like 'Sugar Baby,' 'Crimson Sweet,' or 'Black Diamond.' These require pollination from regular watermelons, so plant a small row of diploid pollinator seeds (like 'Sugar Bush') nearby—about 10 feet away to prevent cross-pollination. Seedless watermelons thrive in full sun with warm soil temperatures above 70°F—they won’t germinate well in cool conditions.
Test soil temperature with a thermometer before planting. If it’s below 70°F, wait or use black plastic mulch to warm the soil faster. Amend the soil with compost to improve drainage, as seedless watermelons are prone to rot in soggy conditions. Space plants 3-4 feet apart in rows 6 feet apart to allow for sprawling vines.
💧 Step 2: Plant Seeds or Transplants at the Right Time
Start seeds indoors 4-6 weeks before the last frost or sow directly into the garden after soil warms to 70°F (use a seedling heat mat if needed). Plant seeds 1 inch deep and 2 inches apart, then thin to 1 plant per hill once seedlings develop 2-3 true leaves. Seedless watermelons are sensitive to transplant shock, so avoid moving them unless necessary.
Water deeply once a week after germination, aiming for 1-2 inches of water per week. Use drip irrigation or soaker hoses to keep foliage dry—this prevents fungal diseases like powdery mildew. Mulch with straw to retain moisture and suppress weeds, which compete for nutrients. You’ll see first true leaves in 7-10 days if conditions are ideal.
☀️ Step 3: Support Vines and Monitor Pollination
Seedless watermelons produce long, sprawling vines that need support. Train vines along trellises or use black plastic mulch to warm the soil and reduce weeds. If growing on the ground, mound soil around the base of the plant to encourage deeper root growth. Prune side shoots to focus energy on 1-2 main vines per plant—this improves fruit size and quality.
Pollination is critical for seedless varieties. Hand-pollinate by transferring pollen from diploid flowers (on the pollinator row) to female flowers (with small watermelon-shaped swellings at the base) using a small paintbrush. Do this in the morning when flowers are open. You’ll know pollination worked when the watermelon begins to swell and the flower wilts naturally.
⏰ Step 4: Harvest at Peak Ripeness for Maximum Sweetness
Seedless watermelons typically mature in 70-90 days, depending on the variety. Check for ripeness by inspecting the underside of the melon—it should turn from white to cream or yellow. Tap the melon with your knuckles; a deep, hollow sound indicates ripeness. The stem should also dry and detach easily from the vine.
Harvest in the morning when temperatures are cooler to preserve sweetness. Cut the melon from the vine with a sharp knife, leaving 1-2 inches of stem attached. Store whole watermelons in a cool, dry place (50-55°F) for up to 2 weeks. For immediate eating, slice and enjoy—you’ll love the juicy, seedless texture you’ve worked so hard to cultivate.
Tips & tricks for growing perfect seedless watermelons
Growing seedless watermelons requires attention to detail—here’s how to avoid common pitfalls and maximize your harvest.
Soil Temperature is Non-Negotiable: Seedless watermelons won’t germinate below 70°F, so always test your soil temperature before planting. If it’s cooler, use black plastic mulch to warm it faster—this can raise soil temps by 5-10°F within days. I’ve seen seedlings fail to sprout when planted too early, even with warm air temperatures. A simple soil thermometer is worth its weight in gold here.
Pollination Strategy: Hand-pollinating seedless watermelons is critical, but timing matters. Transfer pollen from diploid flowers to female flowers in the morning when flowers are fully open—this gives pollen time to set before the heat of the day. I use a small paintbrush for precision, but you can also gently shake vines near each other if you’re growing pollinator varieties nearby. Watch for the telltale wilted flower as confirmation.
Pruning for Quality: Focus your plant’s energy by pruning side shoots, leaving just 1-2 main vines per plant. This might seem counterintuitive, but it directs nutrients toward fewer, larger fruits. I’ve seen plants with 10+ small melons versus 2-3 perfect specimens—quality over quantity every time. Prune in the morning to give wounds time to heal before evening moisture sets in.
Harvesting at Peak Ripeness: The underside of a ripe seedless watermelon turns cream or yellow, but don’t rely solely on color. Tap it—ripe melons sound hollow when tapped with your knuckles. Also check the stem: it should detach easily from the vine. Harvesting in the morning preserves sweetness, as daytime heat can cause sugars to break down faster. Store whole melons at 50-55°F to extend freshness for up to 2 weeks.
Pro Tips for No Seed Watermelon
- Growing seedless watermelons requires attention to detail—here’s how to avoid common pitfalls and maximize your harvest.
- Soil Temperature is Non-Negotiable: Seedless watermelons won’t germinate below 70°F, so always test your soil tempera...
- Pollination Strategy: Hand-pollinating seedless watermelons is critical, but timing matters. Transfer pollen from dip...
Frequently asked questions
1. Why does my no-seed watermelon still have seeds?
Even "seedless" watermelons can develop small, sterile seeds due to pollination. These varieties are triploid (3 sets of chromosomes) and need a diploid (2 sets) watermelon nearby for fertilization—but the seeds won’t germinate. If seeds are large and viable, your plant may have cross-pollinated with a seeded variety. Try isolating plants next time!
2. How long does it take for no-seed watermelons to ripen?
No-seed watermelons typically take 70–90 days to mature, depending on the variety and climate. Look for a creamy yellow spot where the melon rested on the ground, a dull rattle when shaken, and a firm, heavy feel. Warm nights (70°F+) speed up ripening!
3. Can I grow no-seed watermelons in containers?
Yes! Choose compact varieties like 'Sugar Baby' or 'Tiny Tim' and use a 5-gallon container with drainage. Ensure full sun (6+ hours) and well-draining soil. Containers dry out faster—water deeply 2–3 times weekly. Just avoid overcrowding; vines need space to sprawl!
4. What should I do if my no-seed watermelon plant flowers but doesn’t fruit?
Poor fruiting often stems from temperature stress (below 60°F or above 95°F), lack of pollinators, or over-fertilizing with nitrogen. Hand-pollinate with a small brush if bees are scarce. Reduce nitrogen (use a low-N, high-P fertilizer) and ensure consistent watering. Patience—some varieties need 2–3 weeks after flowering to set fruit.
5. Are no-seed watermelons less sweet than regular ones?
Not necessarily! Seedless varieties like 'Crimson Sweet' or 'Black Diamond' are bred for flavor, often scoring high in sugar content (10–12 Brix). Taste tests show they’re just as sweet—or sometimes sweeter—than seeded types. The trade-off? They’re easier to eat without spitting seeds!
Wrapping up and next steps
Growing no-seed watermelons is a rewarding experience that brings sweet, seedless rewards to your table! 🍉 With the right variety, soil, and care, you’ll enjoy juicy, ripe melons without the hassle of seeds. Whether you’re a beginner or a seasoned gardener, these tips will help you cultivate a bountiful harvest.
Ready to take the next step? Start small—plant a few seeds or seedlings this season and experiment with different varieties. Before you know it, you’ll be savoring the fruits of your labor with every refreshing bite!
Happy gardening! 🌱