Size
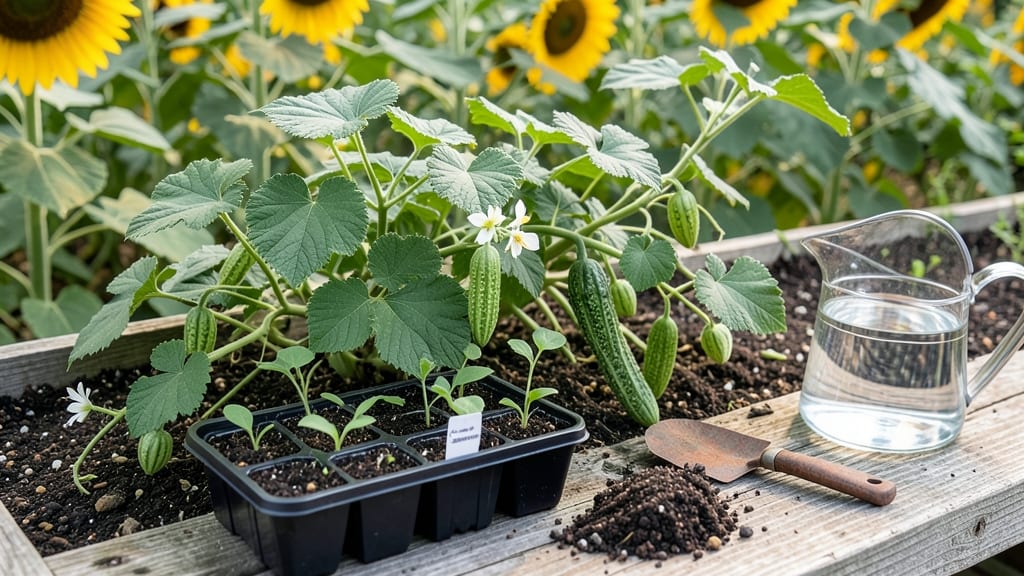
Growing cucamelon seeds from scratch is the easiest way to get these tiny, grape-sized fruits that taste like a cross between cucumber and lime. 🌱 I started with just a handful of seeds and a sunny windowsill, and now I’m harvesting crisp, tangy cucamelons all summer long—no greenhouse or fancy equipment needed.
The secret to success is patience and the right setup: warm soil, consistent moisture, and plenty of sunlight. You’ll need small pots or a seed tray, lightweight potting mix, and a way to give them support once they start climbing.
Cucamelons are vining plants, so trellising early saves you from tangled messes later.
By mid-summer, you’ll be snipping clusters of these bite-sized fruits straight off the vine, perfect for salads or snacking. The flavor is addictive—bright, refreshing, and just sweet enough to keep you coming back for more. Plus, they’re prolific, so one plant often means plenty to share with neighbors.
Works just as well on a balcony as in a garden bed, and thrives in containers as long as you give it room to spread. Here’s how to turn those tiny seeds into a harvest that’ll have everyone asking for seconds.
📚 In This Guide
- What you need
- Instructions
- Tips and common mistakes
- Wrapping up and next steps
What you need
- ● Cucamelon seeds: 3–5 seeds (or a small packet for multiple plants). Look for heirloom or organic varieties for best results!
- ● Containers or pots: 5–7 inch diameter pots (1 per plant) or
- ● A large container (10+ inches wide) with drainage holes for multiple plants.
- ● Potting mix: Well-draining, seed-starting mix or a lightweight garden soil blend (avoid heavy clay).
- ● Drainage trays or saucers (to catch excess water and prevent root rot).
- ● Spray bottle (for gentle watering during germination).
- ● Grow lights or a sunny windowsill (6+ hours of sunlight daily, or a full-spectrum LED grow light for indoor setups).
- ● Trellis or small stakes (3–4 feet tall; cucamelons are vining plants!).
- ○ Fertilizer (optional but helpful): A balanced, water-soluble fertilizer (5-5-5 or 10-10-10) or compost tea.
- ● Seed-starting heat mat (speeds up germination in cooler climates).
- ● Humidity dome or plastic wrap (to retain moisture while seeds sprout).
- ● Organic mulch (like straw or shredded leaves) to retain soil moisture.
- ● Pest control: Neem oil or insecticidal soap (for aphids or spider mites).
- ● Pruning shears (for trimming vines as they grow).
Step-by-step instructions for growing cucamelon seeds indoors
Here's how I get these quirky little melons thriving in containers—no greenhouse needed.
🌱 Step 1: Start Seeds in Warm, Moist Soil
Fill 4-inch pots with moistened seed-starting mix (not garden soil—it's too dense). Press it down gently so the surface is firm but not packed. Cucamelons love warmth, so place the pots in a spot that stays around 70-75°F—a sunny windowsill or a seedling heat mat works best.
Plant 2-3 seeds per pot just below the soil surface—about ¼ inch deep. Cover lightly with more mix, then mist the surface until evenly damp. Don't water heavily; you'll just wash the seeds deeper than they need to be. Keep the soil consistently moist but never soggy.
💧 Step 2: Provide Humidity and Light for Germination
Cover the pots with a clear plastic dome or plastic wrap to trap warmth and moisture. Cucamelons germinate best in high humidity, so check daily for condensation on the cover. If it fogs up, you're golden—if it stays dry, mist the soil lightly and reseal.
Place the pots under a grow light or in the brightest window you have (south-facing is ideal). Without enough light, seedlings stretch leggy and weak. You'll see sprouts in 7-14 days—don't be impatient and dig for them before then.
☀️ Step 3: Thin Seedlings and Move to Larger Pots
Once seedlings have 2-3 true leaves (the first set are just baby leaves), thin to the strongest one per pot. Snip the others at the base with clean scissors—don't pull, or you'll disturb the roots of the one you're keeping.
When seedlings are about 4 inches tall, transplant them into 1-gallon containers filled with well-draining potting mix. Bury them deeper than they were in the small pots—up to the first set of true leaves. This encourages stronger root growth.
🪴 Step 4: Train Vines and Support Growth
Cucamelons need support to climb, so install a 5-foot tall trellis or tomato cage in each container. Gently weave the main vine through the trellis as it grows—don't force it, or you'll snap the delicate stems. Prune side shoots to focus energy on the main vine.
Water at the base when the top inch of soil feels dry. These plants love moisture but hate soggy roots, so ensure your containers have drainage holes. Feed with a balanced liquid fertilizer every 2 weeks once flowers appear.
✂️ Step 5: Harvest and Encourage More Fruit
Cucamelons are ready to pick when they're 1-2 inches long and still firm. Use small scissors or your fingers to twist them off the vine—don't cut the stem, or you'll damage the plant. Harvesting encourages more flowers and fruit to form.
Pinch off any yellowing leaves or dead flowers to redirect the plant's energy. With proper care, you'll get a steady harvest for 6-8 weeks. Save seeds from your best cucamelons for next year—just let a few fruits fully ripen and turn orange before scooping out the seeds.
Tips & tricks for growing cucamelons indoors
Here's what I learned after growing these adorable little melons in my own sunny windowsill—tricks that make all the difference between struggling seedlings and a thriving harvest.
Soil Temperature Matters: Cucamelons love warmth, and that 70-75°F range isn't just about germination—it's about setting up strong roots from day one. I use a seedling heat mat under my 4-inch pots during cooler months, and I've noticed seedlings that start in warm soil grow twice as fast. If your space runs cold, consider a small greenhouse dome or even a heated propagator to maintain that perfect temperature.
Germination Secret: Those 7-14 days for sprouts can feel like forever, but there's a trick to speed things up: place your covered pots in a warm, dark spot for the first 3-4 days after planting. This mimics the underground conditions seeds prefer, and I've seen germination happen in just 5-7 days when I do this. After that, move them to light—just don't disturb them until you see those first little leaves.
Transplanting Technique: When you're ready to move your seedlings to 1-gallon containers, don't just dump them in—bury them deeper than they were growing. Up to the first set of true leaves, as the instructions say, but here's the pro move: water the soil in the small pots first, then gently squeeze the root ball to encourage roots to spread outward. This helps them establish faster in their new home.
Support System Hack: For that 5-foot tall trellis, I've found that bamboo stakes work just as well as fancy trellises and cost a fraction of the price. Drive one into each container when you transplant, and gently weave the main vine around it as it grows. The key is to start training early—once the vine gets too heavy, it's harder to maneuver without damaging the delicate stems.
Pro Tips for Grow Cucamelon Seeds
- Here's what I learned after growing these adorable little melons in my own sunny windowsill—tricks that make all the ...
- Soil Temperature Matters: Cucamelons love warmth, and that 70-75°F range isn't just about germination—it's about sett...
- Germination Secret: Those 7-14 days for sprouts can feel like forever, but there's a trick to speed things up: place ...
Frequently asked questions
Got questions about growing cucamelons?
You’re not alone! Here are answers to the most common queries to help you cultivate these tiny, tangy treasures with confidence.
How long does it take for cucamelon seeds to germinate?
Cucamelon seeds typically sprout within 7–14 days when kept in warm (70–85°F), moist soil. If your seeds take longer, check moisture levels—consistent dampness (not soggy!) speeds things up. Patience is key, especially in cooler conditions!
Can I grow cucamelons in containers, and what size pot do I need?
Cucamelons thrive in 5–10 gallon containers with drainage holes. Since they’re vining plants, add a trellis or stakes to save space. Just ensure the pot stays hydrated—container-grown plants dry out faster than in-ground gardens.
When is the best time to plant cucamelon seeds?
Start seeds indoors 4–6 weeks before your last frost date or sow directly outdoors after soil reaches 60°F+. Cucamelons love warmth—planting too early risks slow growth or rot. In warm climates, you can even grow them year-round!
What pests should I watch for, and how do I prevent them?
Common pests include aphids, spider mites, and cucumber beetles. Prevent issues with neem oil or insecticidal soap, and use row covers for young plants. Healthy soil and proper spacing also deter pests—keep your cucamelons happy and they’ll resist invaders!
Can I save seeds from store-bought cucamelons?
Yes, but store-bought seeds may not produce identical plants. Scoop out seeds from ripe cucamelons, rinse them, and dry on paper towels for 1–2 days. Store in a cool, dry place for up to 3 years. For guaranteed results, buy heirloom seeds from a reputable supplier.
Wrapping up and next steps
Growing cucamelons from seeds is a rewarding journey—whether you’re a space-conscious urban gardener or a balcony enthusiast! 🌱 With the right mix of sunlight, soil, and patience, you’ll soon be enjoying these tiny, tangy treats straight from your own plants. Start small, stay consistent, and watch your cukes flourish.
Ready to take the next step? Experiment with flavors—try adding them to salads, salsas, or even cocktails! Once you’ve mastered the basics, explore growing other unique vine plants like pepper vine or moonflower for even more balcony harvests. Happy growing! 🌿