Shrubs
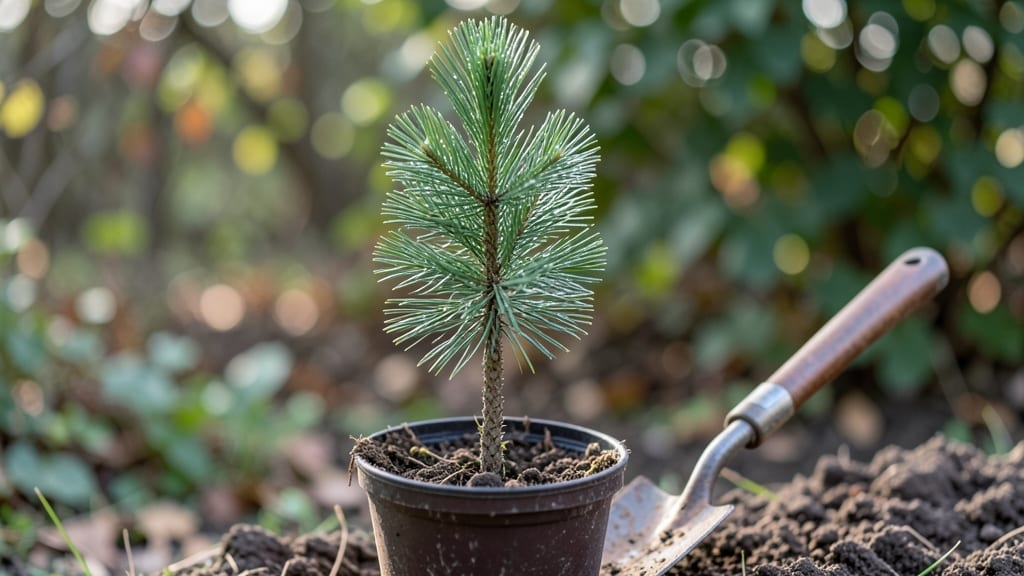
Growing a Norway spruce seedling from scratch means you’re building a living legacy—one that could outlive you by centuries. 🌲 I’ve watched my own seedlings go from fragile 6-inch saplings to 12-foot giants in just a decade, and the secret starts with cold stratification, the process that mimics winter’s natural trick to break seed dormancy.
You’ll need just three things: fresh seeds, a plastic bag with damp peat moss or paper towels, and your fridge’s coldest shelf. The process takes about 90 days, but it’s worth it—skipping this step means seeds that either rot or never sprout.
Once stratified, you’ll plant them in well-draining soil, rich with organic matter, and keep them moist but never soggy.
By late spring, you’ll see those first bright green needles pushing through the soil, a sign your patience paid off.
These seedlings thrive in full sun to partial shade and tolerate poor soil better than most trees, making them perfect for windbreaks, privacy screens, or that grand forest feel in your yard.
Fair warning: Norway spruce grows fast—2-3 feet per year when happy—and can reach 60+ feet if given space. Start small, but think big. Here’s how to give your seedlings the best possible start.
📚 In This Guide
- What you need
- Instructions
- Tips and common mistakes
- Wrapping up and next steps
What you need
- ● Norway spruce seeds: 100–200 seeds (fresh or stored properly for no more than 2 years). Aim for certified forest-grown seeds for best results.
- ● Cold stratification medium: Option 1: Damp peat moss or coco coir (2–3 cups, moist but not soggy).
- ● Option 2: A paper towel or paper coffee filter (for a quick, low-mess setup).
- ● Sealed plastic bag or container: A ziplock bag (quart-sized) or airtight container with a lid (e.g., a small Tupperware).
- ● Water: Room-temperature, dechlorinated water (let tap water sit for 24 hours if chlorinated).
- ● Potting soil: Well-draining mix (e.g., 50% peat moss + 50% perlite) for transplanting after stratification.
- ● Small pots or trays: 2–3 inch diameter biodegradable pots or seedling trays (for 50–100 seedlings).
- ○ Spray bottle: For gentle misting of seeds (optional but helpful).
- ● Label maker or markers: To label seeds/containers (e.g., "Norway Spruce – Stratified Jan 2024").
- ○ Thermometer: A small fridge thermometer (optional, to monitor 33–41°F (1–5°C) during stratification).
- ● Grow lights or sunny windowsill: For 12–14 hours of light/day after germination.
- ● Fertilizer: Balanced, water-soluble (e.g., 10-10-10) at ½ strength once seedlings sprout 2–3 inches.
Step-by-step instructions for cold stratifying Norway spruce seeds
Here's how to break dormancy and grow sturdy forest-grown saplings from scratch.
🌱 Step 1: Collect and Prepare the Seeds
Gather fresh Norway spruce cones from the forest floor in late fall—look for fully opened cones with exposed seeds. Remove the seeds by gently prying them out with your fingers or a small tool. Store them in a paper bag in your freezer until you're ready to stratify.
Don't rush this step. Fresh seeds germinate best, and storing them in the freezer mimics their natural winter dormancy. If you're working with older seeds, soak them in lukewarm water for 12 hours first to soften the tough outer coating. This helps weaken the seed's resistance to early germination.
❄️ Step 2: Perform Cold Stratification
Fill a sealed plastic container with 2-3 inches of moistened peat moss or perlite—just damp enough to hold together when squeezed but not dripping. Sprinkle the Norway spruce seeds evenly over the surface, spacing them about 1 inch apart to prevent crowding later. Cover the seeds with another 1 inch of the same moist medium. This mimics the cold, moist conditions of a forest floor.
Place the container in a refrigerator (not freezer) where temperatures stay between 35-40°F. Keep it in the dark—light won't help at this stage. Check the moisture every 2-3 weeks and mist lightly if the medium feels dry to the touch. Stratification typically takes 4-6 weeks, but some seeds may need up to 8 weeks to break dormancy.
☀️ Step 3: Warm Up and Plant for Germination
Once the stratification period is complete, remove the container from the refrigerator and place it in a warm, bright location—like a sunny windowsill or under grow lights providing 12-14 hours of light daily. The seeds should begin germinating within 2-4 weeks. You'll notice tiny green shoots pushing through the soil, signaling it's time to transplant.
When the seedlings reach 2-3 inches tall, carefully transfer them to individual 2-inch pots filled with a well-draining potting mix. Water gently after planting, ensuring the soil is moist but not soggy. Keep the pots in a shady spot for the first week to reduce stress on the young roots.
🌿 Step 4: Harden Off and Transplant Outdoors
After the seedlings have grown 4-6 inches tall and developed 3-4 sets of true needles, they're ready for outdoor hardening. Start by placing them outside in a sheltered, partially shaded spot for 2-3 hours the first day. Gradually increase their outdoor time over 7-10 days, eventually moving them to full sun for a few hours daily.
Once the seedlings can handle full sun without wilting, transplant them into the ground or larger 5-gallon containers. Space them 6-8 feet apart to allow room for growth. Mulch around the base with 2-3 inches of organic mulch to retain moisture and protect the roots from temperature swings.
Tips & tricks for perfect Norway spruce seedling stratification
Between us, this is where patience pays off—and where most people give up too soon. The secret to reliable germination lies in the details, not just the timeline.
Seed Selection: The 12-hour soak for older seeds is your secret weapon for tough outer coatings. I've seen seeds that needed this extra step pop up within days of stratification, while untreated seeds took weeks to break dormancy. Use lukewarm water—not boiling—and change it after 6 hours to prevent bacterial growth. Trust me on this: the difference between 50% and 90% germination often comes down to this single preparation step.
Moisture Management: That 2-3 inch layer of peat moss or perlite needs to stay consistently damp, not soggy. I learned this the hard way after losing a batch to mold—too much moisture creates anaerobic conditions that kill seeds. Test by squeezing a handful: it should feel like a wrung-out sponge. During the 4-8 week stratification period, check every 2-3 weeks and adjust with just a light mist if needed.
Temperature Consistency: The 35-40°F range in your refrigerator is critical—don't let it creep higher. I keep a thermometer in my fridge to monitor this, especially during summer months when appliances can run warmer. If your fridge fluctuates, consider using a dedicated seed stratification fridge or even a well-insulated cooler with ice packs. The goal is to mimic those cold, stable forest floor conditions where nature does its magic.
Light Timing: Once you move to the warm, bright location in Step 3, those 12-14 hours of light become non-negotiable. I use a simple LED grow light on a timer to ensure consistency—natural light varies too much. The moment you see those first green shoots (usually within 2-4 weeks), that's your cue to prepare for transplanting. Don't rush this stage; impatient seedlings often fail when moved too soon.
Pro Tips for Norway Spruce Seedling
- Between us, this is where patience pays off—and where most people give up too soon. The secret to reliable germinatio...
- Seed Selection: The 12-hour soak for older seeds is your secret weapon for tough outer coatings. I've seen seeds that...
- Moisture Management: That 2-3 inch layer of peat moss or perlite needs to stay consistently damp, not soggy. I learne...
Frequently asked questions
Got questions about growing Norway spruce seedlings? You’re in the right place! Here are answers to the most common queries—from timing to troubleshooting—so you can nurture healthy saplings with confidence.
How long does cold stratification take for Norway spruce seeds?
Cold stratification for Picea abies seeds typically requires 60–90 days in moist, refrigerated conditions (33–41°F). Plant the seeds in fall for natural winter stratification, or mimic it indoors with a mix of peat moss and sand. Patience pays off—this step breaks seed dormancy for better germination!
When is the best time to plant Norway spruce seedlings outdoors?
Plant bare-root seedlings in early spring or fall when soil temps are cool (40–50°F). Avoid summer heat, which stresses young roots. If using container-grown saplings, transplant anytime the ground isn’t frozen. Pro tip: Water deeply after planting to reduce shock!
Can I grow Norway spruce from cuttings instead of seeds?
While possible, seedlings are far easier for beginners. Cuttings require hormone rooting powder and a humid environment (70–80% humidity). Seeds offer genetic diversity, and saplings grow faster. If you’re set on cuttings, use semi-hardwood cuttings in late summer—just expect a slower start!
Why aren’t my Norway spruce seedlings germinating?
Common culprits: unstratified seeds, dry soil, or poor light. Ensure seeds are chilled, keep soil moist (not soggy), and place trays in bright, indirect light. If mold appears, reduce moisture and improve airflow. Patience is key—germination can take 2–4 weeks post-stratification!
How fast do Norway spruce seedlings grow, and when can I transplant them?
Seedlings grow 1–2 feet per year under ideal conditions (full sun, well-drained soil). Transplant to permanent spots after 2–3 years when roots fill the container. Space them 6–10 feet apart for mature trees. Bonus: Prune lower branches early to encourage a strong trunk!
Wrapping up and next steps
Growing Norway spruce seedlings from forest-grown saplings is a rewarding journey that blends patience with nature’s resilience. By mastering cold stratification, you unlock the potential for thriving, hardy trees that enhance your landscape or reforestation efforts.
Whether you’re a gardener, landscaper, or conservationist, these steps empower you to nurture saplings with confidence—one season at a time! 🌱
Ready to take the next step? Start small: gather your materials, prep your stratification setup, and monitor progress like a pro. Before you know it, you’ll be transplanting sturdy seedlings into the soil—because every great forest begins with a single seed!