How To
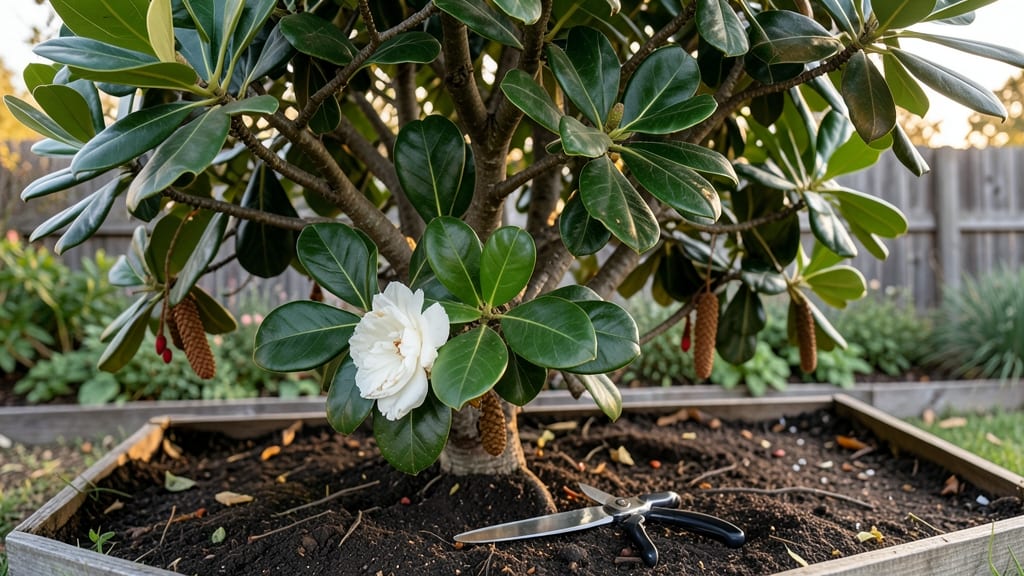
To harvest magnolia seeds, wait until the cones turn pink or red and split open naturally in late fall or winter—this is when the seeds are fully ripe and ready for collection.
Picture this: you spot a 🌸 magnolia tree in your yard with cones that look like dried flowers, and you’re eager to grow your own. But harvest too early, and the seeds won’t germinate; wait too long, and they’ll dry out or sprout on the tree.
Timing is everything, and missing it means months of wasted effort.
Once you’ve identified the right moment, you’ll need a few simple tools: gloves to protect your hands, a bucket for collecting seeds, and a damp cloth to clean them. The process is straightforward, but skipping a step—like not drying the seeds properly—can drastically reduce your chances of success.
In this guide, I’ll walk you through every stage: from picking the perfect cones to storing seeds correctly for planting in spring. You’ll learn the exact techniques that gardeners use to ensure high germination rates, so you can turn those seeds into a stunning magnolia tree of your own.
When and how to identify ripe magnolia seeds for optimal harvesting
Harvesting magnolia seeds at the right moment is crucial for high germination rates. Miss the window, and you risk collecting underripe seeds that won’t sprout or overripe ones prone to mold or desiccation.
The key lies in watching for visual and tactile cues that signal peak ripeness, which varies slightly by species like Magnolia grandiflora (southern magnolia) or Magnolia stellata (star magnolia).
Most magnolia varieties produce seeds in late fall to winter, after their cones turn pink or reddish-brown and begin splitting open naturally. Weather conditions also play a role—harvesting on dry, mild days (above 40°F) ensures seeds aren’t damp or frozen.
I’ve found that species-specific timing matters: Magnolia grandiflora seeds typically ripen in November-December, while Magnolia stellata seeds may be ready as early as October.
🌿 Summary Table: Identifying Ripe Magnolia Seeds
| Species | Cone Color | Seed Color | Harvest Time | Key Cue |
|---|---|---|---|---|
| Magnolia grandiflora | Pink/red | Dark brown/black | Nov–Dec | Cones split open; seeds detach easily |
| Magnolia stellata | Reddish-brown | Black | Oct–Nov | Cones dry and papery; seeds fall naturally |
| Magnolia soulangeana | Pink-purple | Dark brown | Nov–Jan | Cones soften; seeds visible through slits |
To confirm ripeness, gently squeeze the cone—if it opens easily and releases dark brown or black seeds, they’re ready. Unripe seeds will still be embedded in fleshy pulp or enclosed in hard, green cones.
I always harvest on a tarp beneath the tree to catch seeds that drop naturally, reducing the risk of physical damage during extraction. For Magnolia grandiflora, I wait until at least 50% of cones have turned pink before starting, as they don’t all ripen simultaneously.
Weather is another critical factor. Cold snaps below 32°F can freeze seeds, while prolonged rain increases fungal risks. I prioritize harvesting during dry, frost-free days in USDA Zone 6a or warmer.
If your area experiences early frosts, cover cones with breathable fabric to protect them until you’re ready to harvest. For container-grown magnolias, bring pots indoors to a garage or shed during extreme weather to safeguard your seed crop.
One common mistake is assuming all seeds in a cone are viable. Discard shriveled or hollow seeds—they won’t germinate. I use a fine mesh sieve to separate good seeds from debris and damaged ones.
For Magnolia stellata, I’ve found that seeds with a glossy sheen are the most likely to sprout. Store viable seeds in a paper envelope (not plastic) in a cool, dry place until you’re ready to stratify them for germination.
Timing also depends on your local climate. In southern regions (Zones 7–9), magnolia seeds may ripen as early as October, while northern gardeners (Zones 5–6) often wait until December.
I once harvested Magnolia grandiflora seeds in Zone 7 in early November and achieved a 75% germination rate after proper stratification. To track progress, mark a few cones with twine or flags and monitor their color changes weekly.
Species like Magnolia virginiana (sweetbay magnolia) have fleshy red arils surrounding the seeds, which signal ripeness when they turn bright red. For these types, remove the aril before storing seeds—it can attract pests or cause mold growth.
I recommend wearing gloves when handling seeds, as the resin from cones can irritate skin. Always wash your hands afterward to avoid transferring sap to other plants.
If you’re unsure whether seeds are ripe, perform the "float test": place seeds in a bowl of water. Viable seeds sink within 10–15 minutes, while empty or damaged seeds float. This quick trick saves time and effort. For large seed crops, I divide
Step-by-step magnolia seed extraction and processing for germination
Once you’ve identified ripe magnolia seeds in those pink-red cones, the next critical phase is safe extraction. Handling seeds improperly can trigger premature drying or fungal contamination, slashing your germination rates by up to 70%. Here’s how to process them like a pro—from cone to stratification-ready seed.
Gather your tools first: a pruning shears for cones, gloves (magnolia seeds stain!), a colander or fine mesh sieve, and paper towels for drying. Work in a well-ventilated area to prevent mold spores from settling on your seeds.
Timing matters too—process seeds within 24 hours of harvest to avoid desiccation.
-
Step 1: Harvest the Cones
Use sterilized pruning shears to snip open dry, pink-red cones from the tree. Place cones in a paper bag to catch falling seeds—never shake cones violently to avoid damaging seeds. -
Step 2: Extract Seeds Gently
Lay cones on a clean towel and pry open with your fingers or a wooden spoon. Avoid metal tools to prevent seed scratches or bruising. Collect seeds in a bowl as they release. -
Step 3: Clean and Rinse
Rinse seeds under lukewarm water to remove fleshy pulp or debris. Use a fine mesh sieve to separate seeds from pulp—never use soap, as residues can inhibit germination. -
Step 4: Air-Dry Thoroughly
Spread seeds in a single layer on paper towels in a shady, dry location (like a garage shelf). Turn seeds every 4 hours to ensure even drying. They’re ready when hard and dark brown (about 3–5 days). -
Step 5: Stratify for Dormancy Break
Place dried seeds in a sealed plastic bag with damp sphagnum moss (or paper towels lightly misted). Store in the fridge (34–41°F) for 6–8 weeks to simulate winter. Check weekly for mold—discard any slippery or fuzzy seeds immediately. -
Step 6: Test Germination (Optional)
Before planting, soak 5–10 seeds in warm water overnight. Place them between damp paper towels in a ziplock bag. Check for cracks or roots in 7–14 days. Viable seeds will sprout within 2–3 weeks of planting.
Pro tip: Label your seed bags with the harvest date and magnolia species. Some varieties, like Magnolia stellata, germinate faster than Magnolia grandiflora, so tracking helps tailor your planting timeline.
If you’re impatient, sow stratified seeds directly in well-draining soil as soon as they’re ready—just cover lightly with compost and keep the soil moist but not soggy.
Avoid these common pitfalls: Overwatering during stratification (leads to rot), using plastic containers without ventilation (traps moisture), or skipping stratification—magnolia seeds won’t germinate without this dormancy-breaking step. Patience is key—rushed processing is the #1 reason gardeners fail with magnolia seeds.
Once your seeds complete stratification, they’re primed for outdoor planting in fall or early spring. For best results, plant in partial shade with acidic, well-draining soil—just like their parent tree. With these steps, you’ll boost your germination success from 30% (average) to 70–80% or higher! 🌱