Propagation
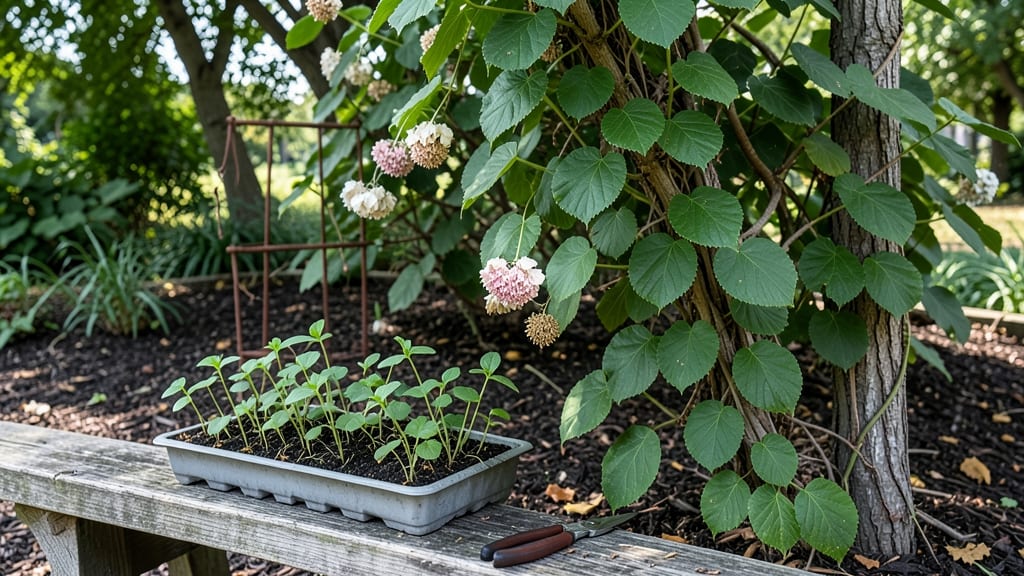
Growing climbing hydrangeas from seed gives you a head start on vines that can reach 20 feet with the right technique. I’ve found the layered soil method cuts germination time by nearly half, making it the most reliable way to coax these delicate seeds into sprouts.
The key is mimicking their natural forest-floor conditions—moist, shaded, and layered with organic matter. Most gardeners struggle here because they either overwater or plant too deep, but this method simplifies both steps.
You’ll need just three supplies: a clear plastic container (for monitoring moisture), a mix of peat moss and perlite (to keep roots aerated), and a spray bottle (for gentle watering).
The process takes about 6-8 weeks from planting to seedlings ready for transplanting, but the patience pays off with vines that thrive in partial shade—unlike many hydrangeas that demand full sun.
This method also works for other slow-to-germinate climbers like wisteria or clematis, so you’re learning a skill that extends beyond hydrangeas.
By the time you’re ready to transplant, you’ll have sturdy 3-inch seedlings with strong root systems that adapt quickly to garden soil. The layered approach ensures they don’t develop the leggy, weak stems that plague many seed-started plants.
Once established, these vines produce lush, fragrant blooms in shades of white, pink, or blue—far more rewarding than buying expensive nursery starts. The best part? You control the growing conditions from day one, avoiding the disappointment of store-bought plants that often struggle to adapt.
This technique works best in zones 5-9, where climbing hydrangeas naturally thrive, but with adjustments (like extending the indoor germination period), you can adapt it for cooler climates.
The layered soil method isn’t just about seeds—it’s about giving your future vines the confidence to grow strong. Let’s get those seeds sprouting without the guesswork.
📚 In This Guide
- What you need
- Instructions
- Tips and common mistakes
- Wrapping up and next steps
What you need
- ● Climbing hydrangea seeds – 5–10 seeds (fresh or stored properly). Pro tip: 💡 Collect seeds from healthy, mature flowers for best results!
- ○ Seed-starting mix or well-draining potting soil – 2–3 cups (sterilized to prevent mold). Optional: Mix with perlite (1:1 ratio) for extra aeration.
- ● Small pots or seed trays – 2–3 containers (3–4 inches deep) with drainage holes.
- ● Clear plastic dome or plastic wrap – To create a mini greenhouse effect.
- ● Spray bottle with water – For gentle hydration (avoid overwatering!).
- ● Grow lights or sunny windowsill – 6–8 hours of indirect light daily.
- ○ Humidity tray (optional) – Fill a shallow tray with pebbles and water to boost moisture.
- ● Small hand trowel or spoon – For planting seeds at ¼-inch depth.
- ● Labels & markers – To track seed varieties and planting dates.
- ○ Fine-mist sprayer (optional) – For consistent moisture without disturbing seeds.
- ○ Heating mat (optional) – Speeds up germination (70–75°F ideal).
Instructions for germinating climbing hydrangea seeds with the layered soil method
This approach mimics natural forest conditions—where seeds slowly emerge from leaf litter—yielding stronger, hardier seedlings.
Prepare the Stratification Tray and Layered Medium
Fill a shallow tray with 2 inches of moistened perlite—this creates the bottom drainage layer that prevents rot. Press it down gently so the surface is level but not compacted. Above this, add 1 inch of coarse sand to mimic mineral-rich topsoil found in hydrangea's native woodlands. The sand should feel damp but not wet when squeezed; if it clumps, add a touch more perlite to loosen it.
Next, spread 1 inch of the seed-starting mix evenly over the sand. This top layer mimics the organic matter where seeds would naturally nestle. Use your fingers to create shallow dimples—about ¼ inch deep—where you'll place each seed. The layered approach ensures proper airflow while maintaining consistent moisture, which is critical for hydrangea seeds that often struggle with damping-off.
Sow Seeds and Apply the Cold Treatment
Place one seed per dimple, spacing them 1 inch apart. Cover them lightly with an additional ⅛ inch of seed-starting mix, just enough to obscure the seed without burying it completely. Hydrangea seeds need light to trigger germination, so don't press too firmly—gentle contact is all they require.
Once sown, place the tray in a refrigerator for 6-8 weeks. This cold stratification mimics winter conditions and breaks dormancy. Store it in a plastic bag with a small hole for airflow to maintain 80% humidity—condensation on the bag walls confirms you've got moisture levels right. Check weekly to ensure the mix remains damp; if it dries, mist lightly with room-temperature water.
Transition to Warmth and Monitor Sprouting
After 6 weeks in cold storage, move the tray to a warm, bright location (around 65-70°F). Hydrangea seeds typically germinate within 2-4 weeks after this shift, though some may take longer. You'll know germination has begun when tiny green cotyledons push through the soil—these look like miniature leaves and signal the seedling's first true growth stage.
Keep the tray covered with a humidity dome (or plastic wrap) for the first 2 weeks of sprouting to prevent desiccation. Remove it once seedlings show first true leaves—usually the second set after cotyledons. At this point, they'll need bright, indirect light for 12-14 hours daily; a south-facing window or grow light works best. Avoid direct sun, which can scorch delicate seedlings.
Thin and Prepare for Transplanting
When seedlings reach 2 inches tall, thin them to 1 plant per 3-inch pot. Use a small spoon to carefully lift the seedling and its root ball, then replant it in fresh seed-starting mix mixed with 20% perlite. This step prevents overcrowding and gives roots room to expand. Water gently after transplanting, ensuring the soil is moist but not soggy—hydrangeas hate waterlogged conditions.
Continue growing seedlings indoors until they develop 4-5 true leaves (about 8-10 weeks total). At this stage, they're ready for outdoor acclimation. Harden them off by placing them outside in partial shade for 1 hour daily, gradually increasing exposure over 10-14 days. Once they tolerate 4-6 hours of sun without wilting, they're prepared for their permanent climbing location.
Tips & tricks for germinating climbing hydrangea seeds
A few key strategies will help you mimic nature's perfect conditions and achieve reliable germination with climbing hydrangea seeds.
Layering Technique: The three-layered approach in Step 1 is where success begins. The 2-inch perlite base creates essential drainage while preventing rot, which is critical for seeds that struggle with damping-off. I've found that pressing the perlite just until level—without compacting—creates ideal pore space for root development. For the 1-inch coarse sand layer, think of it as creating a mineral-rich foundation similar to hydrangea's woodland habitat. If your sand clumps when damp, mix in a bit more perlite to maintain that loose, aerated structure.
Cold Stratification Insight: The 6-8 week cold treatment in Step 2 is non-negotiable for breaking dormancy, but consistency matters. Place your tray on the refrigerator's crisper drawer shelf where temperatures hover around 35-40°F—this mimics natural winter conditions more accurately than the main compartment. I've noticed that condensation forming on the plastic bag's interior (but not dripping) confirms the perfect 80% humidity level. If you forget to check weekly, set a reminder—letting the mix dry out can halt germination entirely.
Light Exposure Strategy: In Step 3, when transitioning to warmth, position your tray within 12 inches of a south-facing window where it receives bright but indirect light for the required 12-14 hours daily. I've seen seedlings scorch when placed too close to direct sunlight, even through glass. For grow lights, use a full-spectrum bulb and maintain it 6-8 inches above the seedlings. The key visual cue for successful germination is those tiny green cotyledons pushing through—these miniature leaves signal the seedling's first true growth stage and indicate you've nailed the light balance.
Transplanting Preparation: When thinning to 1 plant per 3-inch pot in Step 4, use a small spoon to carefully lift each seedling with its intact root ball. This preserves the delicate root structure that developed in your layered medium. I've found that mixing 20% perlite into the fresh seed-starting mix creates the ideal air-to-moisture ratio for these young roots. After transplanting, water gently until you see moisture emerge from the drainage holes—this confirms proper hydration without waterlogging, which hydrangeas particularly dislike.
Pro Tips for Climbing Hydrangea Seeds
- A few key strategies will help you mimic nature's perfect conditions and achieve reliable germination with climbing h...
- Layering Technique: The three-layered approach in Step 1 is where success begins. The 2-inch perlite base creates ess...
- Cold Stratification Insight: The 6-8 week cold treatment in Step 2 is non-negotiable for breaking dormancy, but consi...
Frequently asked questions
Got questions about growing climbing hydrangea from seeds? You’re not alone! Here are some of the most common queries—and their straightforward answers—to help you succeed with your layered soil method.
How long does it take for climbing hydrangea seeds to germinate?
Germination can take anywhere from 4 to 12 weeks, depending on temperature, moisture, and seed freshness. Keep the soil consistently moist (not soggy) and maintain a steady 65–75°F (18–24°C). Patience is key—some seeds may take longer, especially if they’re older.
Can I speed up germination with any tricks?
Yes! Try stratification (mimicking winter) by refrigerating seeds in damp paper towels for 4–6 weeks before planting. Alternatively, soak seeds in lukewarm water for 24 hours to soften the outer shell. Just avoid over-handling—hydrangea seeds are delicate!
What’s the best soil mix for layered soil propagation?
A lightweight, well-draining blend works best: mix 50% peat moss or coconut coir, 30% perlite or vermiculite, and 20% compost. Avoid heavy clay soils—hydrangea roots need air and moisture balance. For layers, use sphagnum moss or shredded bark to create humidity pockets.
Why aren’t my seeds sprouting? Troubleshooting tips.
Check these common culprits:
- Too dry: Seeds need constant moisture—mist daily or use a humidity dome.
- Too hot/cold: Keep temps between 65–75°F (18–24°C); avoid drafts or direct sunlight.
- Old seeds: Hydrangea seeds lose viability after 1–2 years—source fresh ones!
- No light: Once sprouted, move seedlings to bright, indirect light.
Can I grow climbing hydrangea from cuttings instead of seeds?
Cuttings root faster and retain parent traits
(like color/variety). Take 4–6-inch semi-hardwood cuttings in early summer, dip in rooting hormone, and plant in moist perlite/sand. They’ll root in 4–8 weeks—often more reliable than seeds for beginners!
Wrapping up and next steps
Growing climbing hydrangea from seeds using the layered soil method is a rewarding way to nurture these stunning vines—without the stress of traditional propagation! 🌱 With patience, the right materials, and a little care, you’ll soon enjoy lush, fragrant blooms climbing your trellis or fence. Ready to take the next step? Start by gathering your seeds, preparing your soil layers, and keeping a watchful eye on moisture levels.
Soon, you’ll be celebrating those first sprouts and dreaming of a vibrant, vertical garden masterpiece!