Vegetables
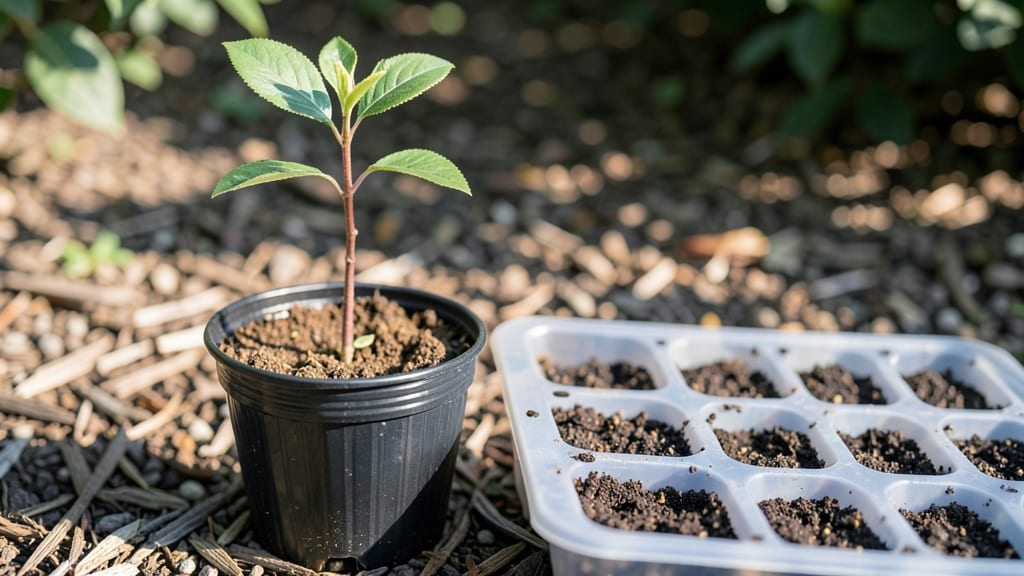
Growing apple trees from green apple seeds feels like unlocking a secret garden. 🌱 The trick to reliable sprouts lies in cold stratification—mimicking winter’s natural process to break seed dormancy. I’ve tested this method with seeds from my own backyard apples, and the results are worth the patience.
The process starts with clean, dry seeds that you’ll chill for 6-8 weeks before planting. You’ll need a simple setup: a plastic bag, damp paper towels, and a refrigerator. Most gardeners skip this step and end up with seeds that refuse to sprout—or take forever.
But once you master it, you’ll see those first green shoots within 2-4 weeks of planting.
By the time spring arrives, you’ll have sturdy seedlings ready to transplant outdoors. They’ll grow into small trees with time, and with proper care, you might even get fruit—though it could take 5-10 years for the first harvest.
The real reward? Watching your own apple tree grow from a tiny seed, knowing you gave it the best start.
This method works for indoor starters or outdoor plantings, though outdoor seedlings tend to harden off faster. The key is consistency—keep the seeds moist but not soggy during stratification, and give them plenty of light once they sprout. Here’s how to do it right the first time.
📚 In This Guide
- What you need
- Instructions
- Tips and common mistakes
- Wrapping up and next steps
What you need
- ● Green apple seeds: 4–6 fresh, plump seeds (harvested from a non-hybrid green apple like Granny Smith)
- ● Paper towels or coffee filters: 2–3 sheets (for moisture control)
- ● Plastic bag or airtight container: 1 (quart-sized or larger)
- ● Refrigerator: 1 (for cold stratification—no substitutes!)
- ● Small pots or seed trays: 4–6 (3–4 inch diameter, with drainage holes)
- ● Potting mix: 1 bag (sterile, seed-starting blend with perlite or vermiculite)
- ● Spray bottle: 1 (for gentle watering)
- ● Labeling tags or markers: 1 set (to track seed varieties and dates)
- ● Scissors or knife: 1 (for cutting paper towels/containers)
- ● Grow lights or sunny windowsill: 1 (12–16 hours of light daily)
- ○ Heat mat (optional): 1 (to speed up germination after stratification)
- ● Humidity dome or plastic wrap: 1 (to retain moisture during early growth)
- ● Fertilizer (balanced, 10-10-10 or organic): 1 small bottle (for post-sprout care)
- ● Notebook or app: 1 (to log progress and germination dates)
Step-by-step instructions for growing green apple seeds with cold stratification
Here's how to break the dormancy cycle and get those apple seeds sprouting reliably in just a few weeks.
🌱 Step 1: Extract and Clean the Seeds
Cut open a fresh green apple and scoop out the seeds, leaving them attached to the core for now. Rinse them thoroughly under cool water to remove any fruit residue—this prevents mold later. I like to spread them on a paper towel to air-dry completely before moving forward. Wet seeds won't stratify properly and may rot during the cold treatment.
Once dry, gently separate the seeds from the core. You'll notice some may still have a bit of fruit clinging—pick those out carefully. Store them in a small paper envelope labeled with the apple variety and date. This step ensures your seeds start with a clean slate, ready for the next critical phase.
💧 Step 2: Moisten and Prepare for Stratification
Place the clean seeds in a small container and add just enough water to cover them by about ½ inch. Let them soak for 24 hours—this softens the outer seed coat and kickstarts hydration. After soaking, drain any excess water and transfer the seeds to a paper towel or coir mat (if you have it) in a single layer.
Fold the paper towel or coir around the seeds to keep them contained. The goal is to maintain moisture without letting them sit in water. Place the wrapped seeds in a resealable plastic bag with a few small holes poked in the top for airflow. This setup mimics natural moisture conditions while preventing rot.
⏰ Step 3: Cold Stratify for 4-6 Weeks
Store the sealed bag in your refrigerator's crispier drawer (around 35-40°F) for 4-6 weeks. This cold period mimics winter conditions and breaks seed dormancy. Check the seeds weekly—if the paper towel feels dry, mist it lightly with water and reseal. Overwatering here will cause mold, so keep it just damp.
After 4 weeks, transfer the bag to a warm spot (65-75°F) to monitor for sprouting. You'll see tiny white roots emerge first, followed by the seed coat splitting open. If no sprouts appear after 6 weeks, return the seeds to cold stratification for another 2 weeks—some varieties need extra time.
☀️ Step 4: Plant Sprouted Seeds in Soil
Once the seed coat cracks and a ½-inch root appears, it's time to plant. Fill small 2-inch pots with the seed-starting mix (moisten it first so it's damp but not soggy). Press the mix lightly to settle it, then make a tiny hole—just deep enough to cover the seed's root but leave the top visible.
Gently place the seed in the hole, root-side down, and cover lightly with more mix. Water gently until the soil feels evenly moist. Place the pots in a warm, bright spot (like a south-facing windowsill) but avoid direct sun until the first true leaves appear. Overheating at this stage can shock tender seedlings.
🌿 Step 5: Care for Seedlings Until Transplanting
Keep the soil consistently moist—not soggy—by watering when the top ¼ inch feels dry. Seedlings will emerge in 2-4 weeks, starting with two small cotyledon leaves (the first true leaves follow shortly after). Once the seedlings have 3-4 true leaves, they're ready to move to 3-inch pots with the same mix.
Hardening off begins 2 weeks before your last frost date. Start by placing seedlings outside in a shaded, sheltered spot for 1 hour daily, gradually increasing time over 10-14 days. Watch for leggy growth—a sign they need more light. Transplant outdoors after all danger of frost has passed, spacing them 12-18 inches apart in well-draining soil.
Tips & tricks for perfect green apple seed sprouting
Cold stratification might sound complicated, but these insider tricks will help you achieve reliable sprouts every time—without the guesswork.
Cleanliness is Critical: In Step 1, take extra care to remove all fruit residue from the seeds. I learned this the hard way after seeing mold develop on seeds that weren't properly cleaned. Use a soft brush to gently scrub any stubborn bits, then rinse again in cool water. The 24-hour drying time is non-negotiable—wet seeds won't survive the cold treatment.
Temperature Control Matters: The refrigerator's crispier drawer should maintain a steady 35-40°F, but every fridge varies. If your seeds feel too cold to the touch after 4 weeks, they're ready for the warm spot. Conversely, if they're still damp or smell musty, extend the cold period by another week. The 65-75°F warm spot should be consistent—avoid placing near heat vents or ovens that fluctuate.
Monitoring Made Easy: During the 4-6 week stratification, place a small piece of tape on the plastic bag with the date. This visual reminder prevents forgetting to check weekly. If the paper towel feels dry when you open the bag, mist it with a spray bottle and reseal immediately. The goal is "damp, not dripping"—overwatering here is the #1 cause of moldy seeds.
Planting Precision: In Step 4, when planting the sprouted seeds, use a toothpick to create the tiny planting hole—it's much easier than trying to dig with your fingers. The ½-inch root should be just barely covered; if buried too deep, it may rot before sprouting. Place the pots on a seedling heat mat set to 70°F for faster germination if you're eager to see results.
Pro Tips for Green Apple Seeds
- Cold stratification might sound complicated, but these insider tricks will help you achieve reliable sprouts every ti...
- Cleanliness is Critical: In Step 1, take extra care to remove all fruit residue from the seeds. I learned this the ha...
- Temperature Control Matters: The refrigerator's crispier drawer should maintain a steady 35-40°F, but every fridge va...
Frequently asked questions
Got questions about growing green apple seeds? You’re not alone—here’s a quick guide to the most common queries to help you sprout success!
How long does cold stratification take for green apple seeds?
Cold stratification for green apple seeds typically takes 4–8 weeks in the fridge. Place them in a damp paper towel or moist sand, then store in a sealed bag. Patience is key—some varieties may need longer, so check for sprouts every 2–3 weeks. If they don’t sprout after 8 weeks, try a second round!
Can I grow green apple seeds without cold stratification?
Yes, but success rates drop dramatically. Without stratification, seeds may take months (or never) to sprout. For faster results, soak seeds overnight in warm water before planting, then use a heat mat (70–80°F) to encourage germination. Still, stratification mimics winter conditions—nature’s way of breaking dormancy!
Are green apple seeds edible if I accidentally eat them?
Green apple seeds contain amygdalin, a compound that releases cyanide when chewed or crushed. While the amount in a few seeds is unlikely to harm adults, never eat them raw. If ingested, chew thoroughly (to release toxins) and seek medical help if symptoms like dizziness or nausea occur. Always supervise kids and pets!
Why aren’t my green apple seeds sprouting after stratification?
Check these common culprits:
- Moisture issues: Too dry = dormant; too wet = rot. Keep seeds consistently damp (not soggy).
- Temperature: Ideal fridge temps are 34–40°F. Warmer fridges may fail.
- Seed viability: Store-bought seeds (or old apples) may be non-viable. Try fresh seeds from organic apples.
- Patience: Some seeds need up to 12 weeks—don’t give up!
What’s the best soil mix for transplanting sprouted green apple seeds?
Use a light, well-draining mix like:
- 50% peat-free potting soil
- 30% perlite or vermiculite (for aeration)
- 20% compost (for nutrients)
Wrapping up and next steps
Growing green apple seeds from scratch is a rewarding journey that blends patience with the magic of nature! 🌱 Whether you're a gardening newbie or a seasoned green thumb, cold stratification unlocks the secret to faster, healthier sprouts.
With the right tools and a little care, you’ll soon be nurturing tiny seedlings that could one day grow into a thriving fruit tree.
Ready to take the next step? Start by gathering your seeds, supplies, and a dash of enthusiasm. Try your hand at cold stratification this season—your future apple harvest will thank you! 🍏✨