Propagation
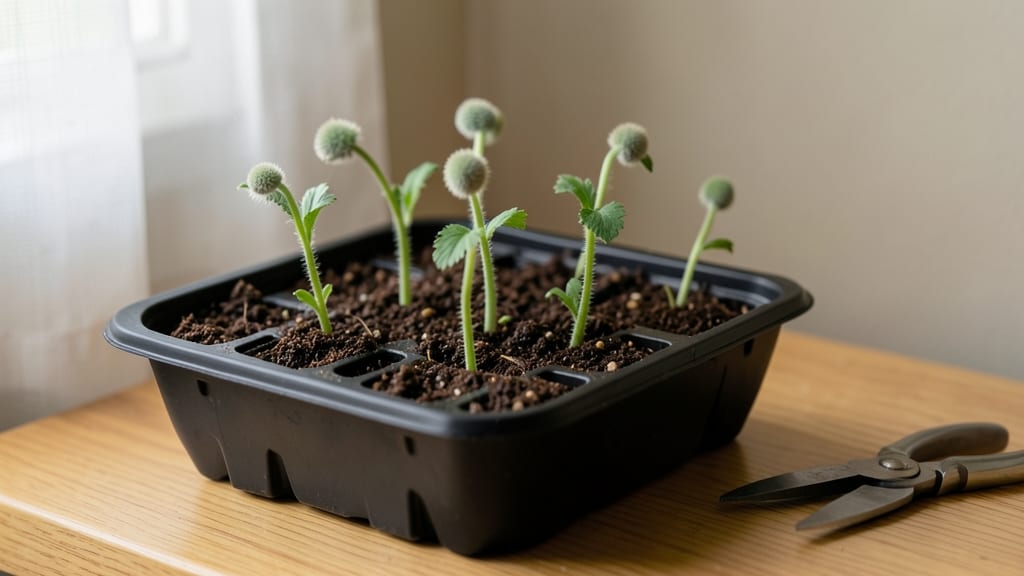
Germinating poppy seeds in just three days without soil feels like magic—but it’s all about the right moisture and warmth. 🌱 I’ve watched these delicate seeds crack open faster than anything else in my garden, and the trick isn’t complicated: patience, a damp paper towel, and a warm spot.
Most people assume poppies need soil to sprout, but the truth is, they’ll push through anything if they’re cozy enough.
The fastest way is to sandwich seeds between damp paper towels, seal them in a plastic bag, and tuck them near a sunny window or under a grow light. Within 24-48 hours, you’ll see tiny white roots—proof you’re on the right track.
This method works for both annual poppies (like the classic California poppy) and perennials (like the Oriental poppy), though annuals tend to be more eager to sprout.
Once they’re sprouting, transplant them into light, well-draining soil—they hate soggy roots. By day 3, you’ll have seedlings ready to handle outdoor conditions, and they’ll bloom in just 6-8 weeks. The key is keeping them consistently moist but never waterlogged, and avoiding direct sun until they’re established.
This technique cuts germination time in half compared to soil-starting, and it’s foolproof for beginners. Whether you’re growing poppies for their bold blooms or just love watching them pop up overnight, this method delivers results without the guesswork. Ready to try it?
📚 In This Guide
- What you need
- Instructions
- Tips and common mistakes
- Wrapping up and next steps
What you need
- ● Poppy seeds: ½ cup (about 70g) of organic, raw poppy seeds (ensure they’re food-grade and untreated).
- ● Glass jar or container: A wide-mouth mason jar (16 oz or larger) or a shallow bowl with a lid.
- ● Cheesecloth or breathable cloth: A small piece (cut to fit jar opening) to cover the jar for airflow.
- ● Rubber band or string: To secure the cloth in place.
- ● Water: Filtered or distilled (avoid tap water if it’s heavily chlorinated).
- ○ Fine-mesh strainer: For rinsing seeds (optional but handy).
- ● Paper towels or clean kitchen towel: For drying seeds if needed.
- ● Small bowl or plate: For soaking seeds separately (if prepping in bulk).
- ● Food dehydrator or oven: For drying sprouts (if saving for later use).
- ● Label or marker: To track sprouting dates (helpful for organization!).
Step-by-step instructions for germinating poppy seeds without soil
Here's how to get poppy seeds sprouting in just 3 days—no dirt required.
💧 Step 1: Soak Seeds for 12 Hours
Place the poppy seeds in a clean bowl and cover them with lukewarm water—about 1 cup per 100 seeds. The water should fully submerge them. I like to use a small jar with a lid to keep everything contained. Let them soak at room temperature (70-75°F) for 12 hours. This softens the tough outer shell and kickstarts germination.
After 12 hours, drain the water and rinse the seeds gently with fresh water. You'll see them plump up slightly—this is your signal they're ready for the next step. Don't skip the rinse; leftover soaking water can introduce bacteria that might slow down sprouting.
🪴 Step 2: Set Up Your Germination Station
Line a shallow tray or plate with a paper towel or dampened cotton cloth. The material should be moist but not dripping wet—squeeze it gently to check. Spread the soaked seeds about 1 inch apart on the towel or cloth. Cover them with another layer of the same material, pressing lightly to ensure contact.
Place the tray in a warm, dark spot—think top of the fridge or a closed cabinet. Poppies sprout best in 75-80°F conditions. The darkness prevents them from stretching too early. You’ll see tiny white sprouts peeking through in 24-48 hours, but don’t peek too often—light and air movement can slow them down.
⏰ Step 3: Monitor and Transplant Sprouts
After 3 days, check for 1-inch sprouts with tiny green leaves unfolding. Once you see these, it’s time to move them to a growing medium. Fill small pots or seed trays with the 1 gallon of moistened potting mix (pre-moistened to avoid shocking the delicate sprouts). Gently press each sprout ½ inch deep into the soil, spacing them 1 inch apart. Pat the soil lightly around them to secure.
Place the pots in bright, indirect light for the first 3-5 days—direct sun can scorch their tender leaves. Water lightly from the bottom by placing the pots in ½ inch of water for 10 minutes, then drain excess. This keeps roots moist without drowning them. You’ll know they’re happy when the leaves stay crisp and upright.
☀️ Step 4: Gradually Introduce Sunlight
After 5 days, transition the sprouts to 4-6 hours of morning sun daily. Poppies love light but can’t handle harsh afternoon rays yet. You’ll notice the stems thicken and leaves darken to a richer green—this means they’re building strength. If you see them leaning toward the light, rotate the pots a quarter turn daily to keep them growing straight.
Once the sprouts reach 2 inches tall (usually 7-10 days after transplanting), they’re ready for their final home. Poppies thrive in full sun now, so move them outdoors or under a grow light for 12+ hours daily. Keep the soil evenly moist but never soggy—poppies hate wet feet.
Tips & tricks for perfect germinated poppy seeds
A few simple tricks will help you achieve those perfect 1-inch sprouts in just 3 days—no soil required!
The Soak Secret: Don't rush the 12-hour soak—this is where germination truly begins. If you're short on time, you can extend to 24 hours, but don't cut it short. The seeds need this full time to soften their outer shells. I like to soak mine in a jar with a lid to keep everything contained and prevent spills.
Temperature Matters: Those 75-80°F conditions are non-negotiable for fast sprouting. If your kitchen runs cooler, place the tray on top of the fridge or near a warm spot. A heating pad on low setting (covered with a towel) can help maintain consistent warmth without overdoing it. Poppies sprout best when they're cozy!
Moisture Management: When setting up your germination station, the paper towel or cloth should be damp but not dripping. I squeeze it gently to check—it should feel like a wrung-out sponge. Overly wet materials can suffocate seeds, while too dry ones prevent sprouting. Aim for that perfect balance, and you'll see those tiny white sprouts in just 24-48 hours!
Transplanting Tip: When moving your 1-inch sprouts to soil, handle them gently to avoid damaging the delicate stems. I like to use a small spoon to lift each sprout and place it in its new home. The ½-inch depth is perfect—any deeper can smother them, while too shallow leaves roots exposed. Pat the soil lightly to secure them without compacting too much.
Pro Tips for Germinated Poppy Seeds
- A few simple tricks will help you achieve those perfect 1-inch sprouts in just 3 days—no soil required!
- The Soak Secret: Don't rush the 12-hour soak—this is where germination truly begins. If you're short on time, you can...
- Temperature Matters: Those 75-80°F conditions are non-negotiable for fast sprouting. If your kitchen runs cooler, pla...
Frequently asked questions
Got questions about germinating poppy seeds? You’re not alone—this quick-growing method can feel tricky at first! Below, we’ve answered the most common questions to help you sprout like a pro in just 3 days.
Can I germinate poppy seeds without any special equipment?
All you need is a clean jar, a damp paper towel, and a rubber band. Skip fancy tools—poppy seeds are easy to sprout with just these basics. Just keep them in a warm, dark spot (like a cabinet) and check daily for moisture.
How long do poppy seeds take to germinate?
Most poppy seeds sprout in 24–72 hours when kept moist and warm. If you’re impatient, try soaking them in warm water for 2 hours first—this can kickstart germination even faster. Pro tip: If they haven’t sprouted in 3 days, gently crush the seed coat with a fork to help them break through.
What if my poppy seeds aren’t sprouting?
Don’t worry—poppy seeds can be finicky! First, check if they’re fresh (old seeds may not germinate). Then, ensure your paper towel stays damp but not soggy (excess water = mold). If they’re still stubborn, try a different method like using a sprouting lid or a shallow tray with a mesh screen.
Are germinated poppy seeds safe to eat raw?
Yes! Once sprouted, poppy seeds are safe and nutrient-packed—just rinse them well to remove any paper towel residue. They’re great in salads, smoothies, or even blended into hummus. Warning: Avoid if you have a poppy seed allergy or are on blood thinners (they contain trace amounts of coumarin).
Can I reuse the jar or towel for another batch?
Not recommended! After sprouting, the jar and towel may harbor bacteria or mold. For safety, use fresh supplies each time. If you’re eco-conscious, sanitize them with a 10% vinegar solution (1 part vinegar, 3 parts water) and let dry completely before reuse.
What’s a good alternative if I don’t like poppy seeds?
Try these fast-sprouting seeds instead:
- Alfalfa – Crunchy, nutty, and ready in 3–4 days.
- Lentils – Mild flavor, great for salads or soups.
- Sunflower seeds – Rich in protein, sprouts in 2–3 days.
- Radish – Peppery kick, germinates in 1–2 days!
Wrapping up and next steps
Germinated poppy seeds are a nutrient-packed, fast-growing superfood that’s surprisingly easy to sprout at home—no soil required! 🌱 With just a few simple steps, you can enjoy fresh, vibrant sprouts in just three days, packed with flavor and health benefits.
Whether you’re a gardening newbie or a seasoned sprouter, this method is your ticket to a fresh, flavorful harvest.
Ready to dive in? Start by gathering your supplies, then follow the step-by-step guide to kickstart your sprouting journey. Once you’ve mastered the basics, experiment with flavors—think tangy salads, creamy hummus, or even baked goods! Your kitchen (and taste buds) will thank you. 😊
Next step: Grab your jar, poppy seeds, and a sunny windowsill—let the sprouting begin! 🌟